
Segmenting Ancient Chinese-Japanese Texts for HTR
The following blog post by Yifang Xia, RDDS Data Science & Society Research Assistant 2025, is a log of her work as part of the work with the Manuscript Collections as Data Research Group. It follows her experience with segmenting an illustrated treatise ca. 1600 on the diagnosis of abscesses and tumors and their treatment, mostly through acupuncture or burning substances near the skin. Copied in Japan in Chinese for Japanese practitioners, Yifang picked this LJS 433 for its irregular handwriting style, which is even more challenging for text recognition compared to other neater materials.

Ancient Chinese HTR Event Log
My project began with Yōso zusetsu (廱疽圖説), an illustrated treatise on diagnosing and treating abscesses and tumors, copied in Japan in Chinese for Japanese practitioners. Unlike other Chinese manuscripts in the Penn Libraries, this one features irregular handwriting, which makes it especially hard to read.
Phase 1: Ground truth setup
Period 1: Aug 27 — Sept 25
With guidance from Jessie Dummer, the Digitization Project Coordinator and Jaj, Applied Data Science Librarian, I first tried eScriptorium. Even with the settings on Han (traditional), centered baseline, and a vertical layout that reads top to bottom and right to left, the platform performed poorly on this manuscript. It failed to recognize vertical text and instead treated the page like horizontal text stacked vertically. So I turned to an open-source OCR model trained for ancient Chinese and chose PaddleOCR from the PaddlePaddle team. It offers many pre-trained models for more than 80 languages and supports both printed and handwritten text.
Two days of setup adventures
It took me two full days to get it running. The early problems included:
Images too large: This was not a model issue. My MacBook’s memory said no.
Version mismatches: Older tutorials and snippets target PaddleOCR 2.5–2.7, while the current release is 3.0.0. Some parameters and APIs changed names or behavior, so the same function sometimes requires different code. See Figure 1 for an example.

Figure 1_Difference
Vertical detection: Detecting and framing vertical text depends on using the right dictionaries for traditional versus simplified Chinese.
This is the basic architecture of my Python code I kept while refining:
Global OCR instance
• We keep a single global OCR instance so we don’t repeatedly initialize PaddleOCR. This saves memory and improves efficiency.
Timeout handling
• A custom timeout mechanism ensures that if OCR or initialization takes too long, the process stops instead of hanging.
• This prevents wasting time on oversized or corrupted inputs.
Safe resize
• Before OCR, oversized images are scaled down to a maximum side length.
• This reduces memory usage, speeds up processing, and prevents crashes.
Detection (core logic)
• detect_boxes() runs PaddleOCR.
It can work in two modes:
With recognition → detect boxes and also output text.
Without recognition → detect boxes only.
Each detected item has:
Polygon coordinates, Text content, Confidence score
The results are scaled back to the original image size. This step is necessary for drawing bounding boxes on the original image.
Visualization
• Bounding boxes are drawn directly on the image.
• If the image is very large, it’s resized first, and boxes are scaled accordingly.
• Saves a visualization file for quick inspection. Figuring out a way to easily inspect whether we get the expected outcome is crucial.
Vertical right-to-left sorting
• Ancient Chinese manuscript texts are written vertically, right to left. This function sorts the boxes in the correct reading order.
Convert to PAGE-XML
• Generates a PAGE-XML file, which we can input into the eScriptorium for manual adjustment.
• Each text line includes:
• Polygon coordinates
• (Optional) recognized text
Main function
• Orchestrates the entire workflow:
• Parse command-line arguments
• Detect boxes
• Save JSON results
• Save visualization
• Export PAGE-XML
• Includes error handling and always clears timeouts at the end.
Day one results
I got no usable output at first. The code looked fine, but the model did not behave. I instrumented the pipeline to log outputs at each stage. PaddleOCR’s docs say detection should return something like [[[x1,y1], [x2,y2], ...], (text, confidence)], but what I saw looked like token-like single characters without proper bounding boxes. My guess is that this came from an unstable function in the new release. The mismatch meant my parser could not proceed.
Rolling back to 2.6 or 2.7 did not help because those builds conflicted with my current Python environment. They wanted an older NumPy that did not play nicely with my other packages. End of day one scorecard: PaddleOCR not yet reliable.
Day two plot twist
I tested Tesseract and got poor results. Then I retried PaddleOCR 3.0.0 with the same code as before. It worked. No changes on my end. The model simply decided to cooperate. Figures 2 and 3 show the contrast.
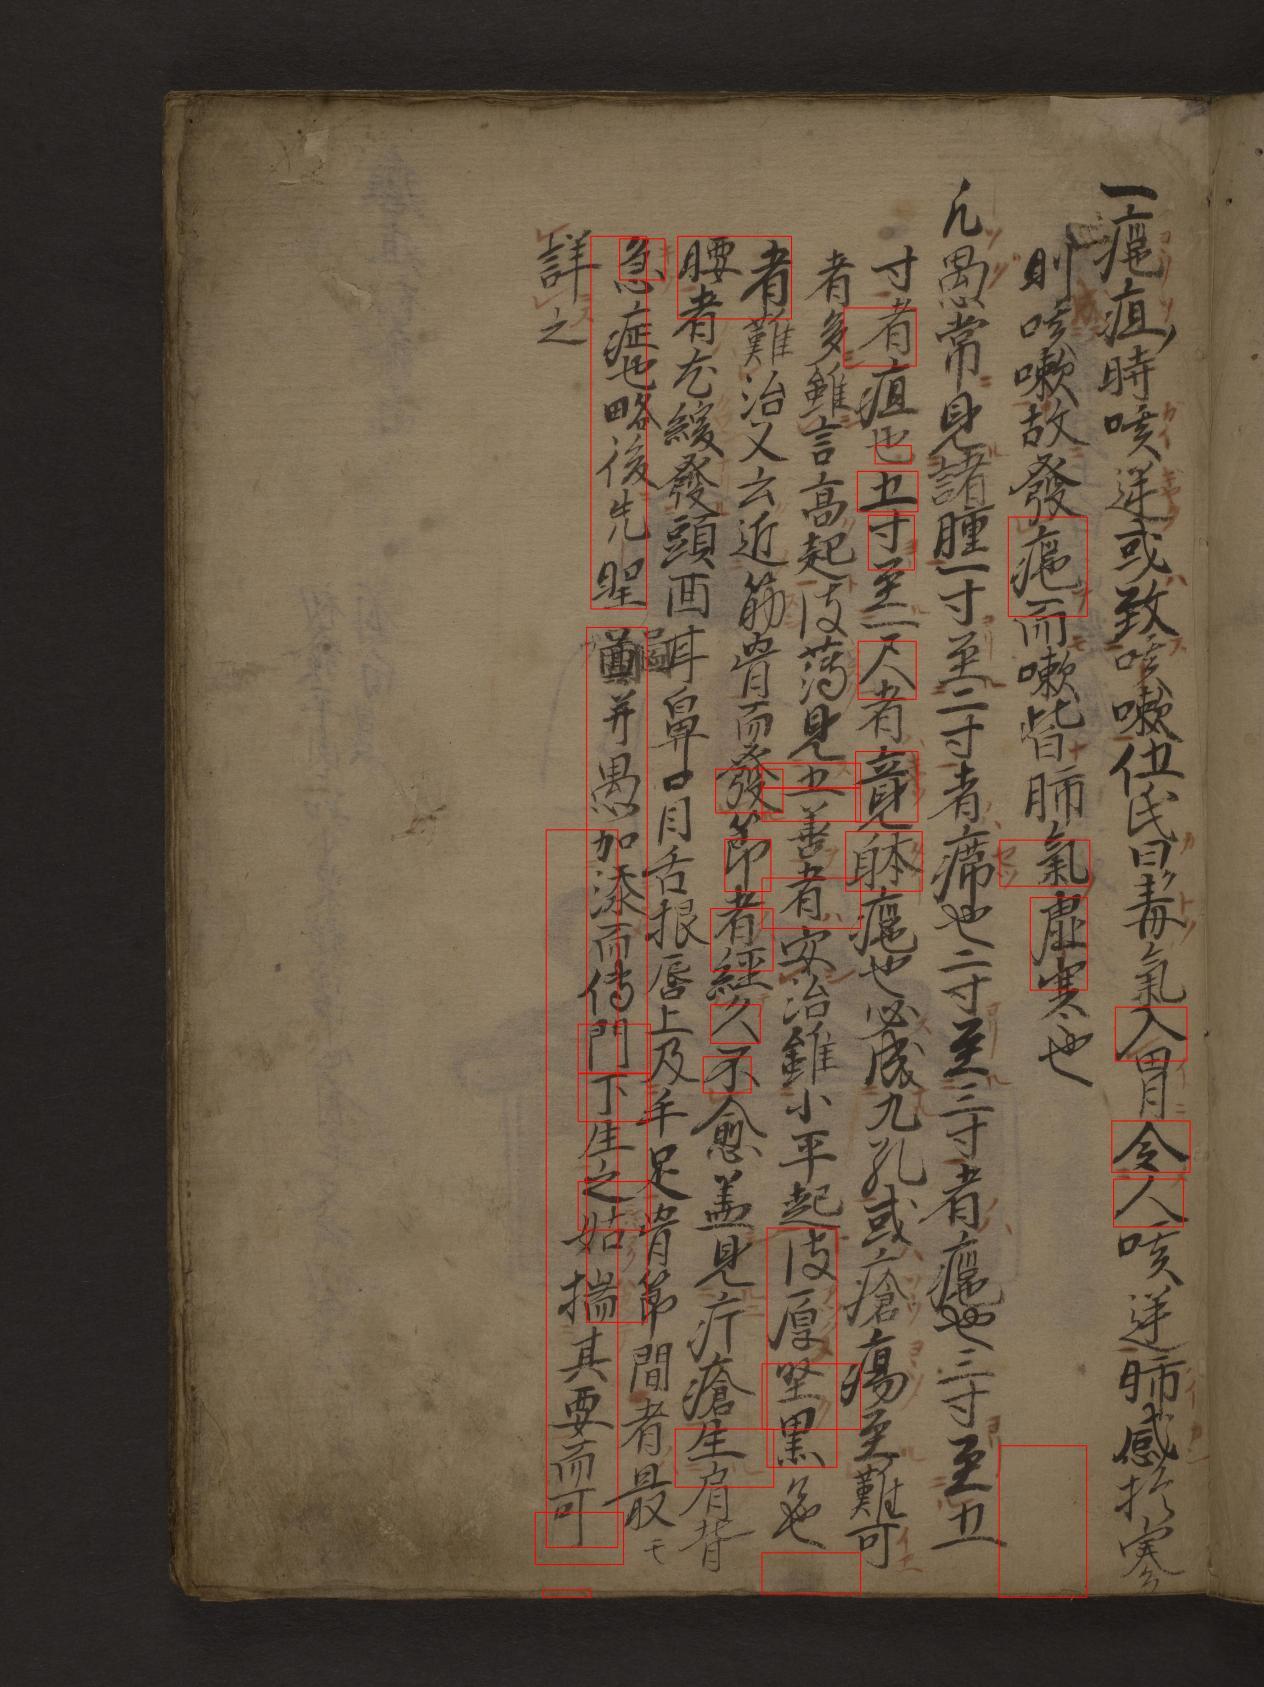
Figure_2 The Result of Tesseract
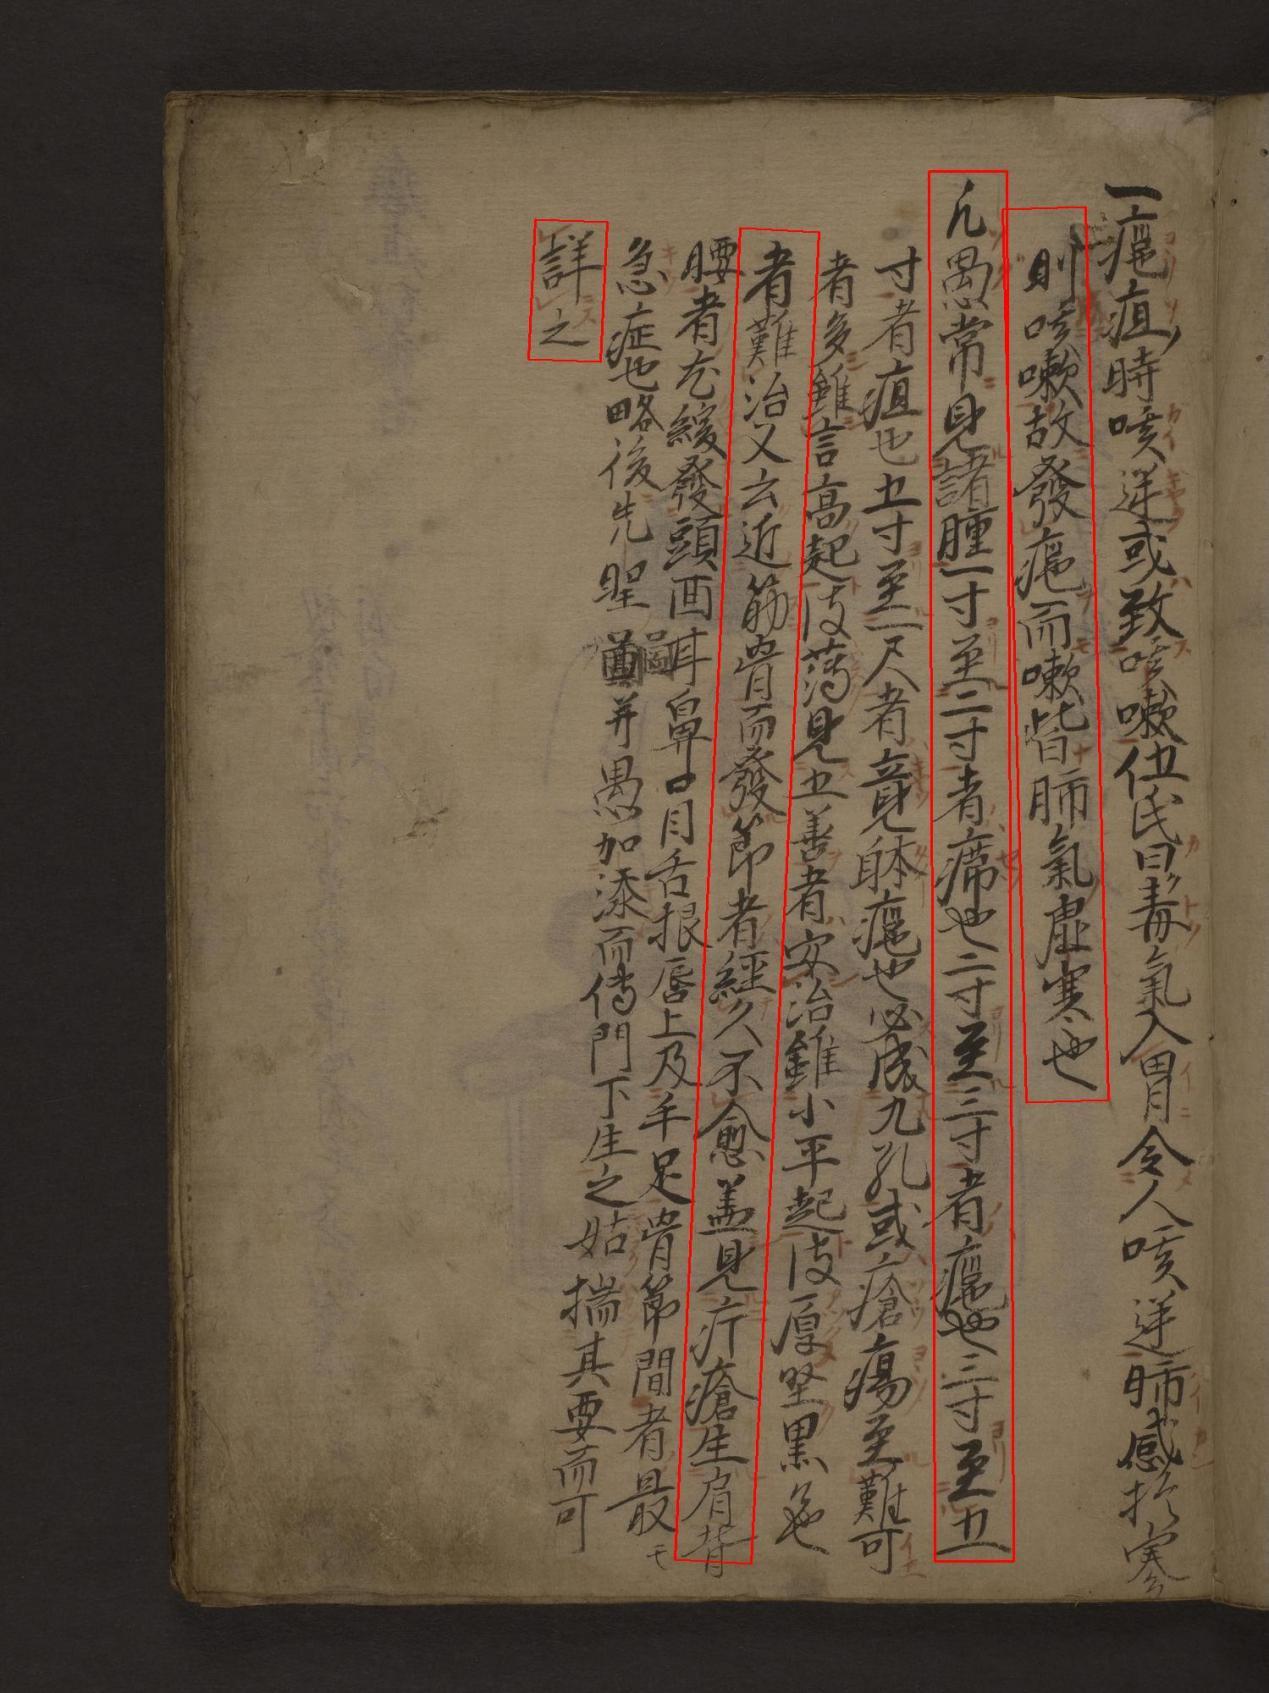
Figure_3 The First Result of Paddle
At first, detection still missed many lines. I lowered the text threshold, increased the unclip ratio, and enabled dilation to widen the detection window. The second run was excellent. All lines were detected correctly. See Figures 4 and 5.
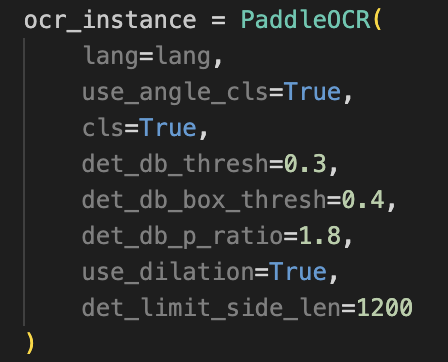
Figure_4 Adding Parameters
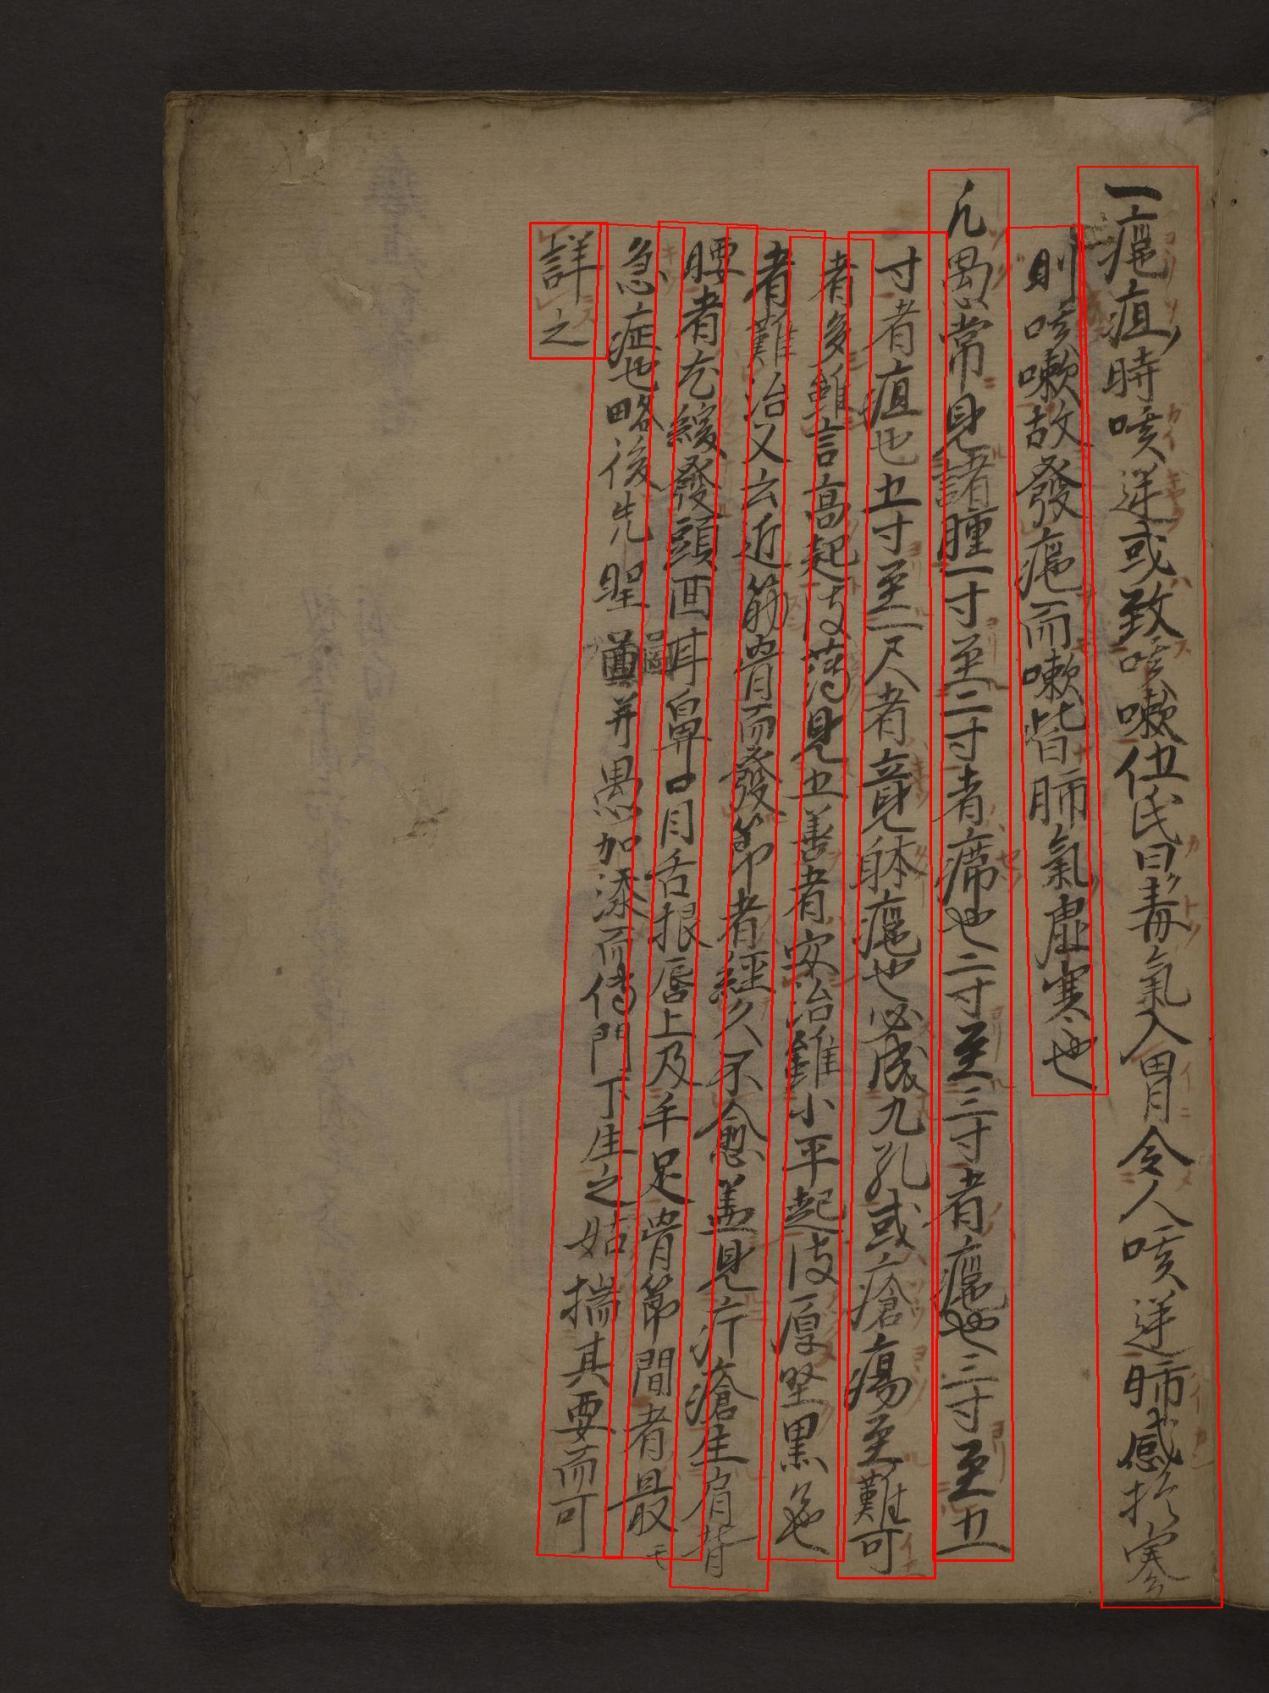
Figure_5 The Second Result of Paddle
Pages with illustrations and show-through
Illustrations interrupted text detection, and some scans suffered from show-through where content from the next page bled into the current one.
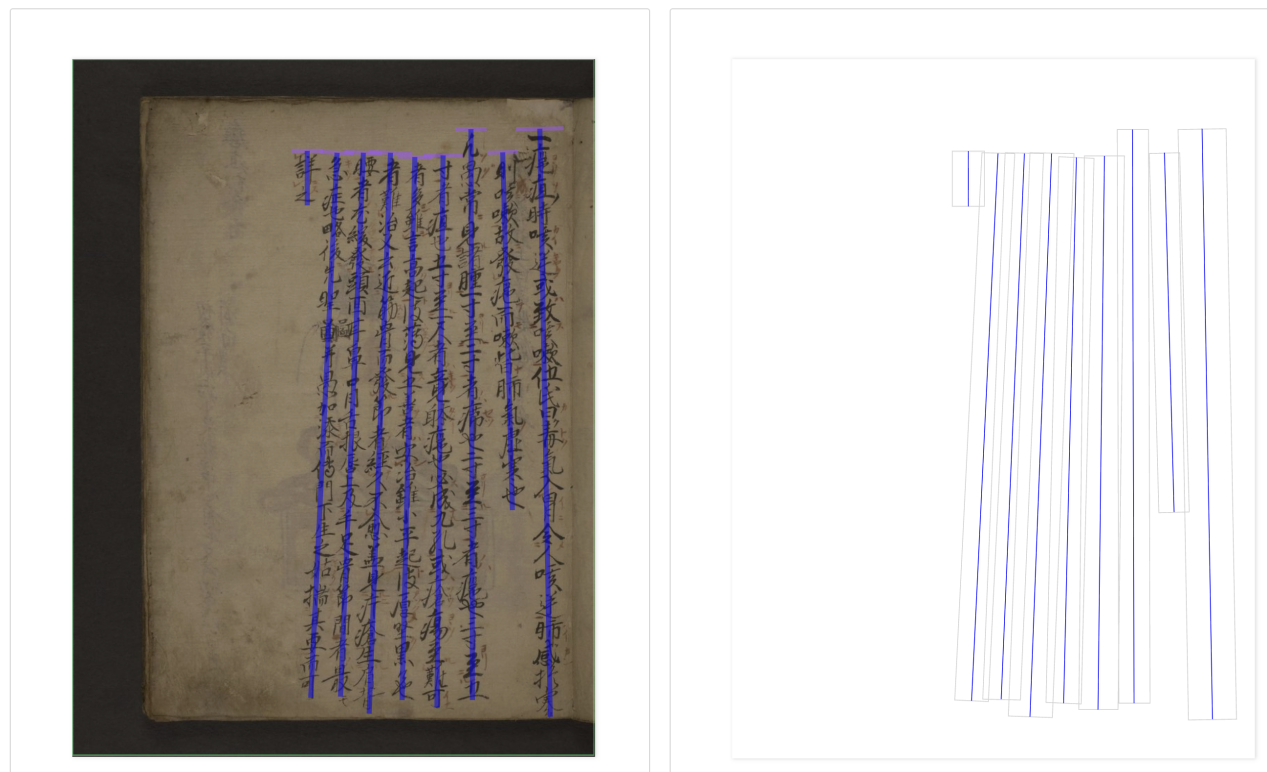
For some pages, increasing the unclip ratio helped (see Figures 6 and 7).
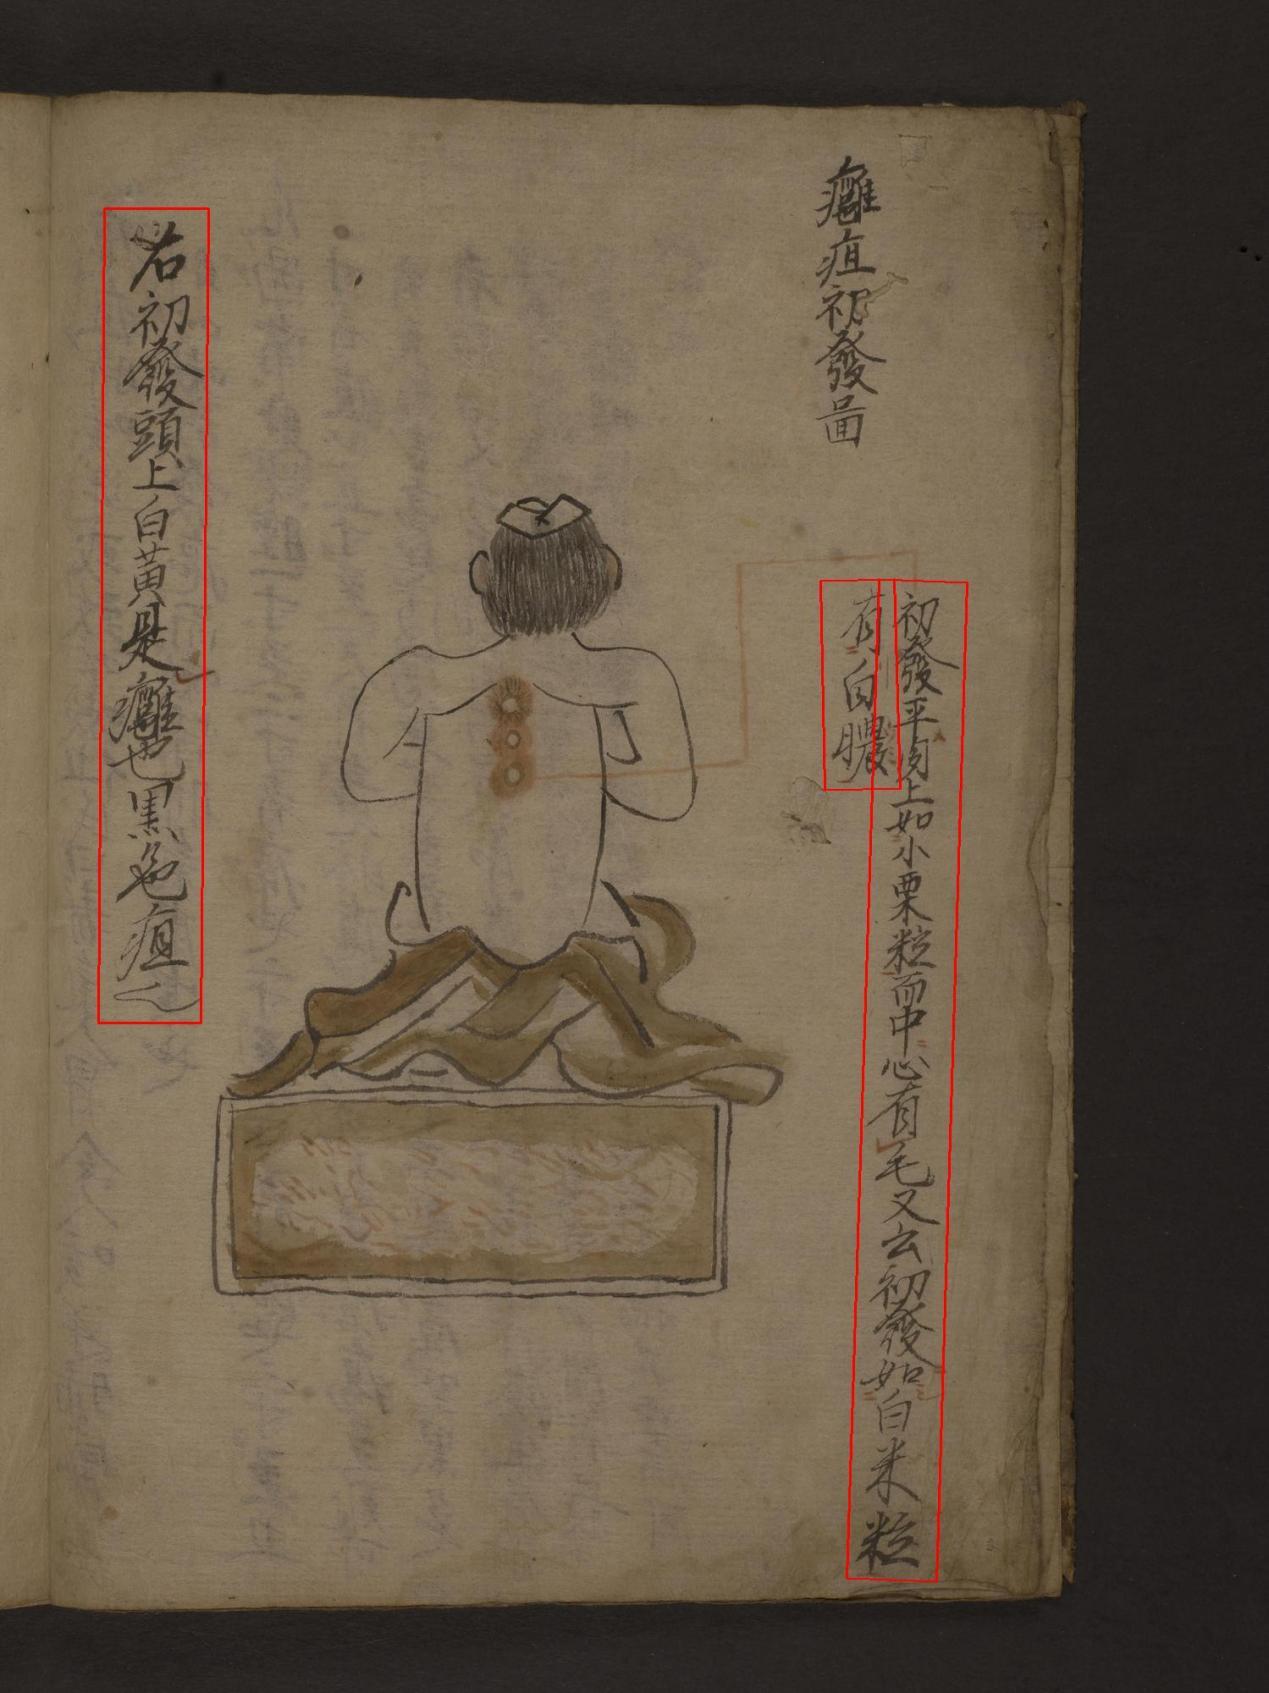
Figure_6 Page4 with unclip = 1.6

Figure_7 Page4 with unclip = 1.8
For others, unclip no longer helped, so I used CLAHE for contrast enhancement (Figures 8, 9, and 10).

Figure_8 Conduct the preprocessing
One gotcha: PaddleOCR expects RGB images. If you do any preprocessing that changes the mode, convert back to RGB before detection.
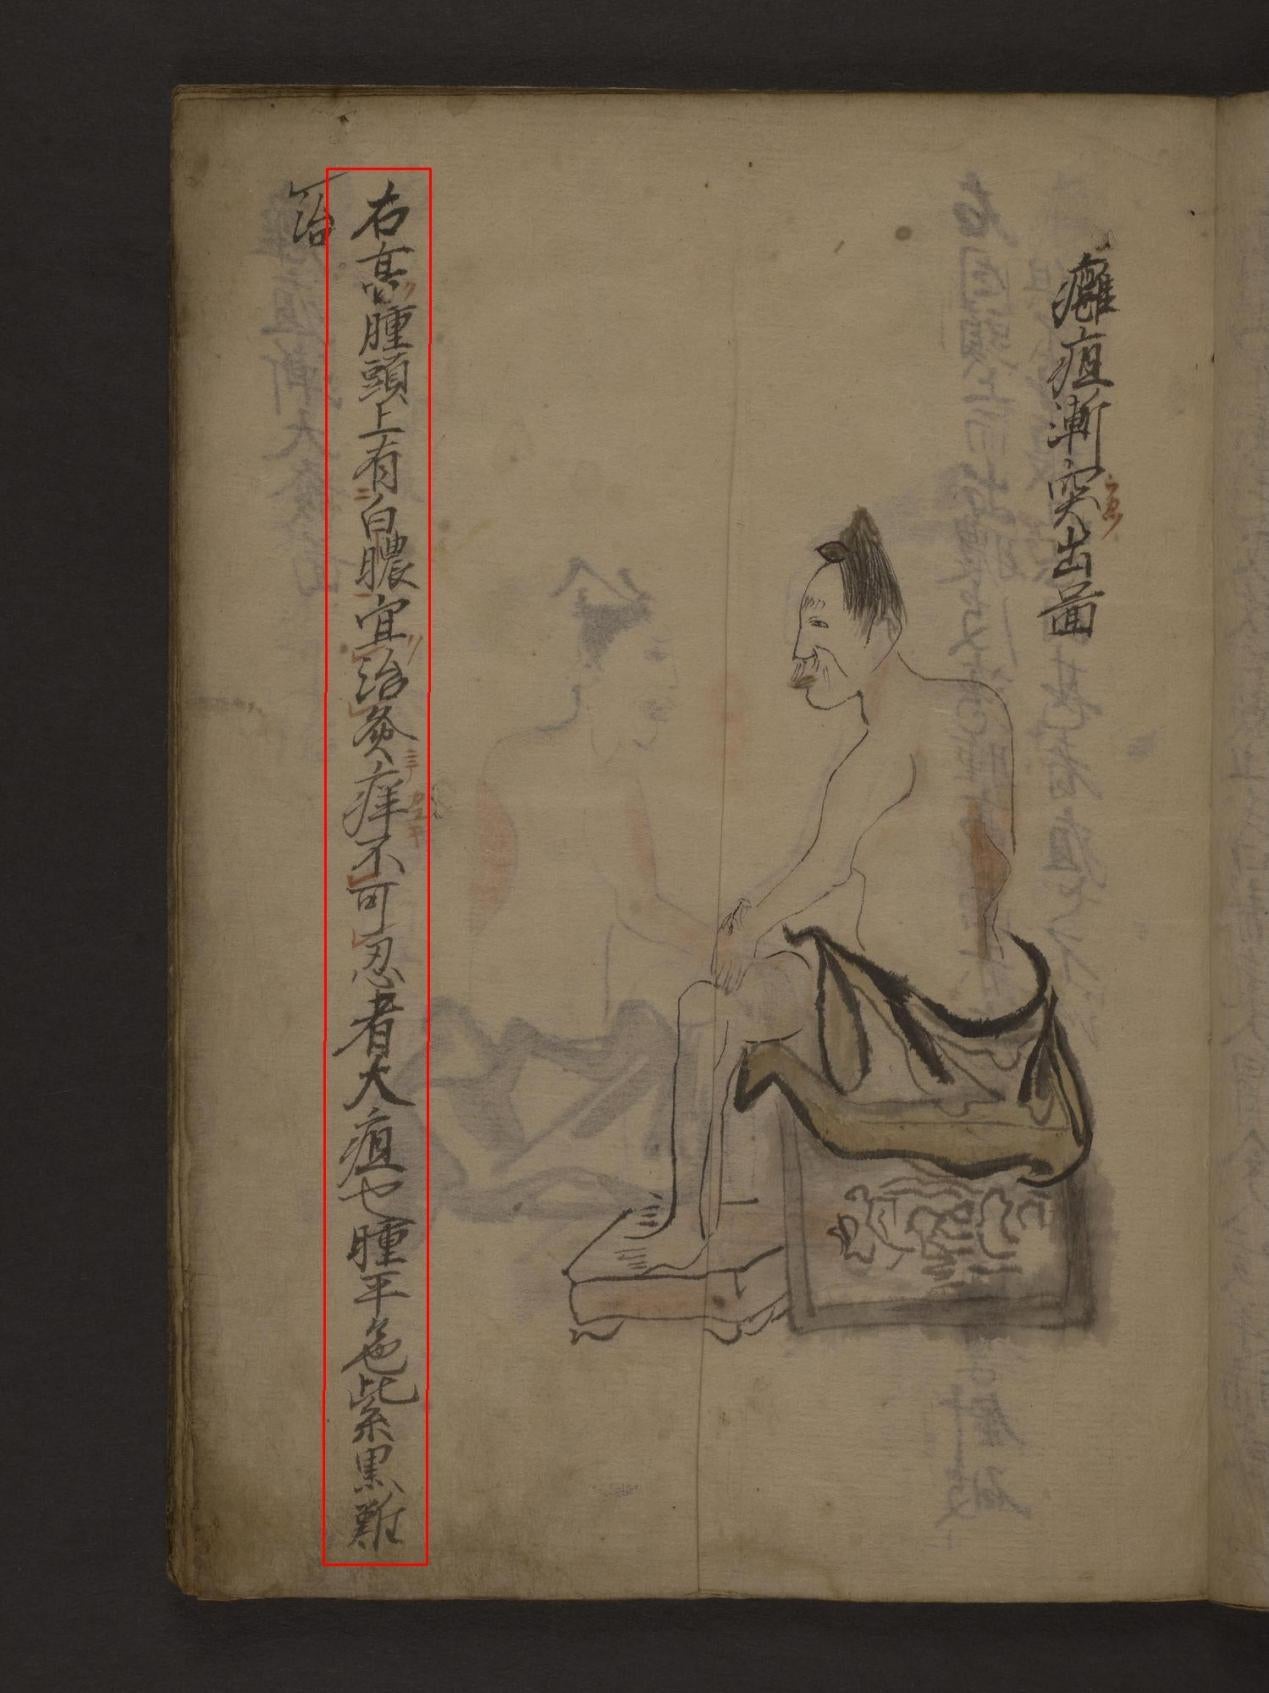
Figure_9 Page5 before CLAHE
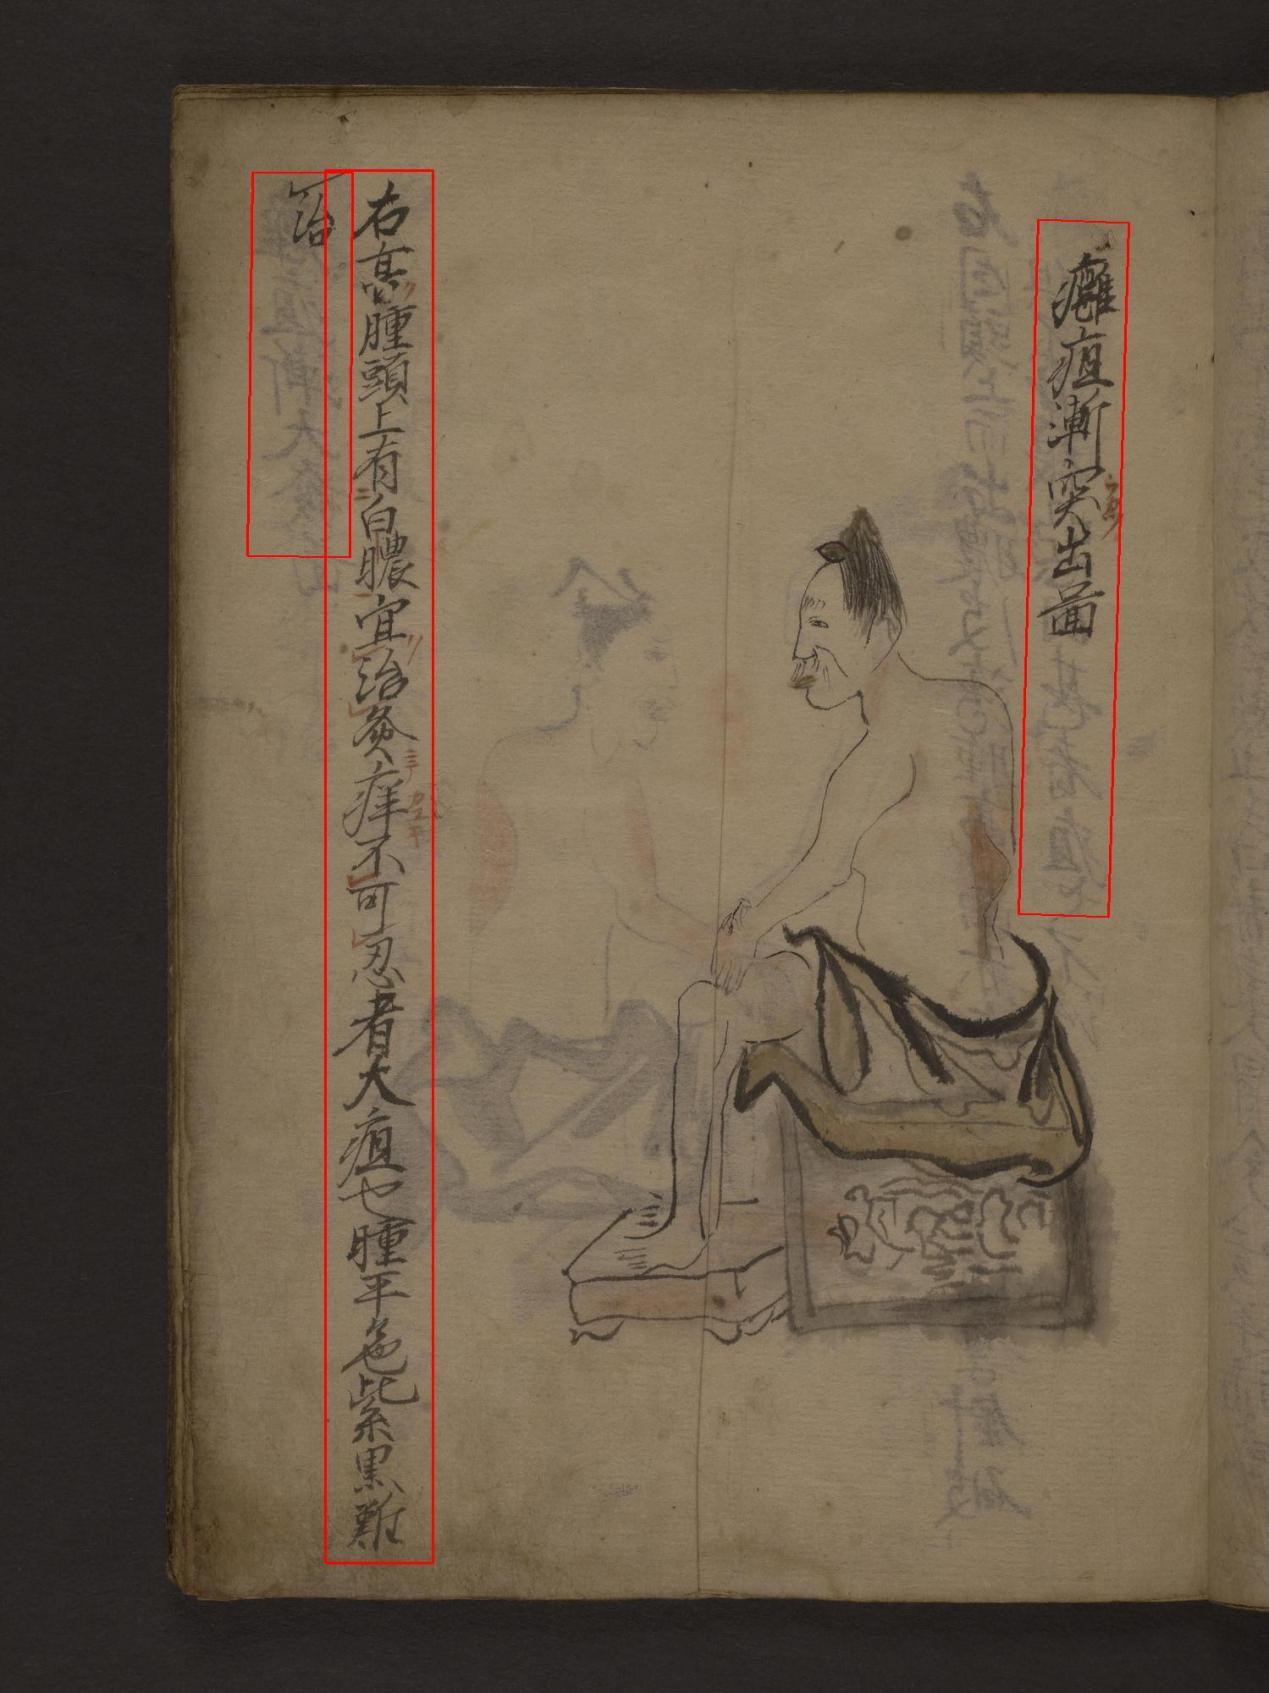
Figure_10 Page5 after CLAHE
On another page, boosting contrast increased both the text and the background noise, and further, distorting those strokes clear enough to be recognized into unrecognizable (Figures 11 and 12).

Figure_11 Page6 before CLAHE
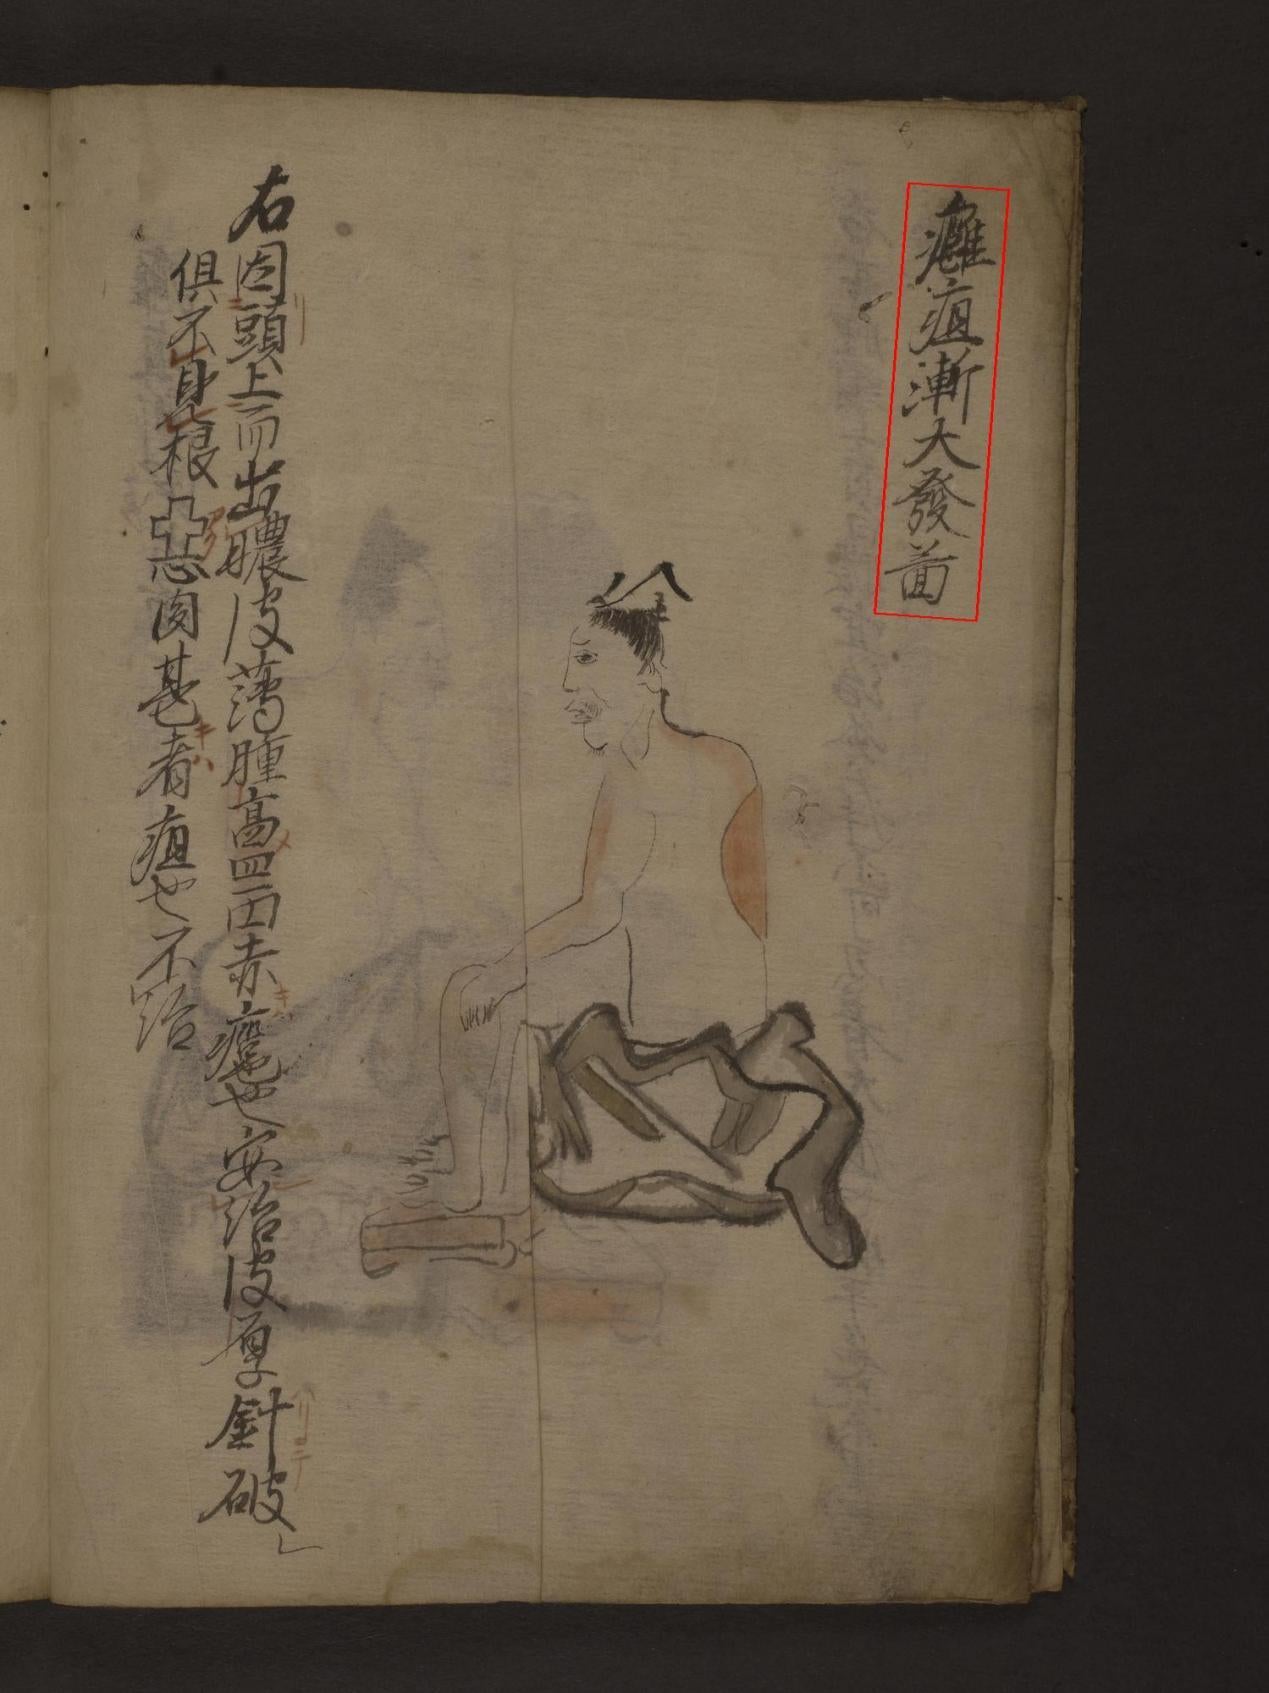
Figure_12 Page6 after CLAHE
To handle this, I added a routine that measures global contrast and boosts only low-contrast regions (Figure 13, 14). This selective approach reduces noise, although it comes with a heavy time cost. Manual adjustment in eScriptorium may be a better trade for production work.
Figure_13 Selective preprocessing_1
Figure_14 Selective preprocessing_2
When nothing else works
I hit a page that looked normal to the human eye but confused PaddleOCR. Only a small area was detected and most text was ignored (Figure 15).
Figure_15 Page9
To reduce background interference, I tried Gaussian blur and several binarization methods. Only Sauvola gave a measurable improvement (Figure 16, 17). Even so, the result was still not good enough, so this page will need manual correction in eScriptorium (Figure 18).
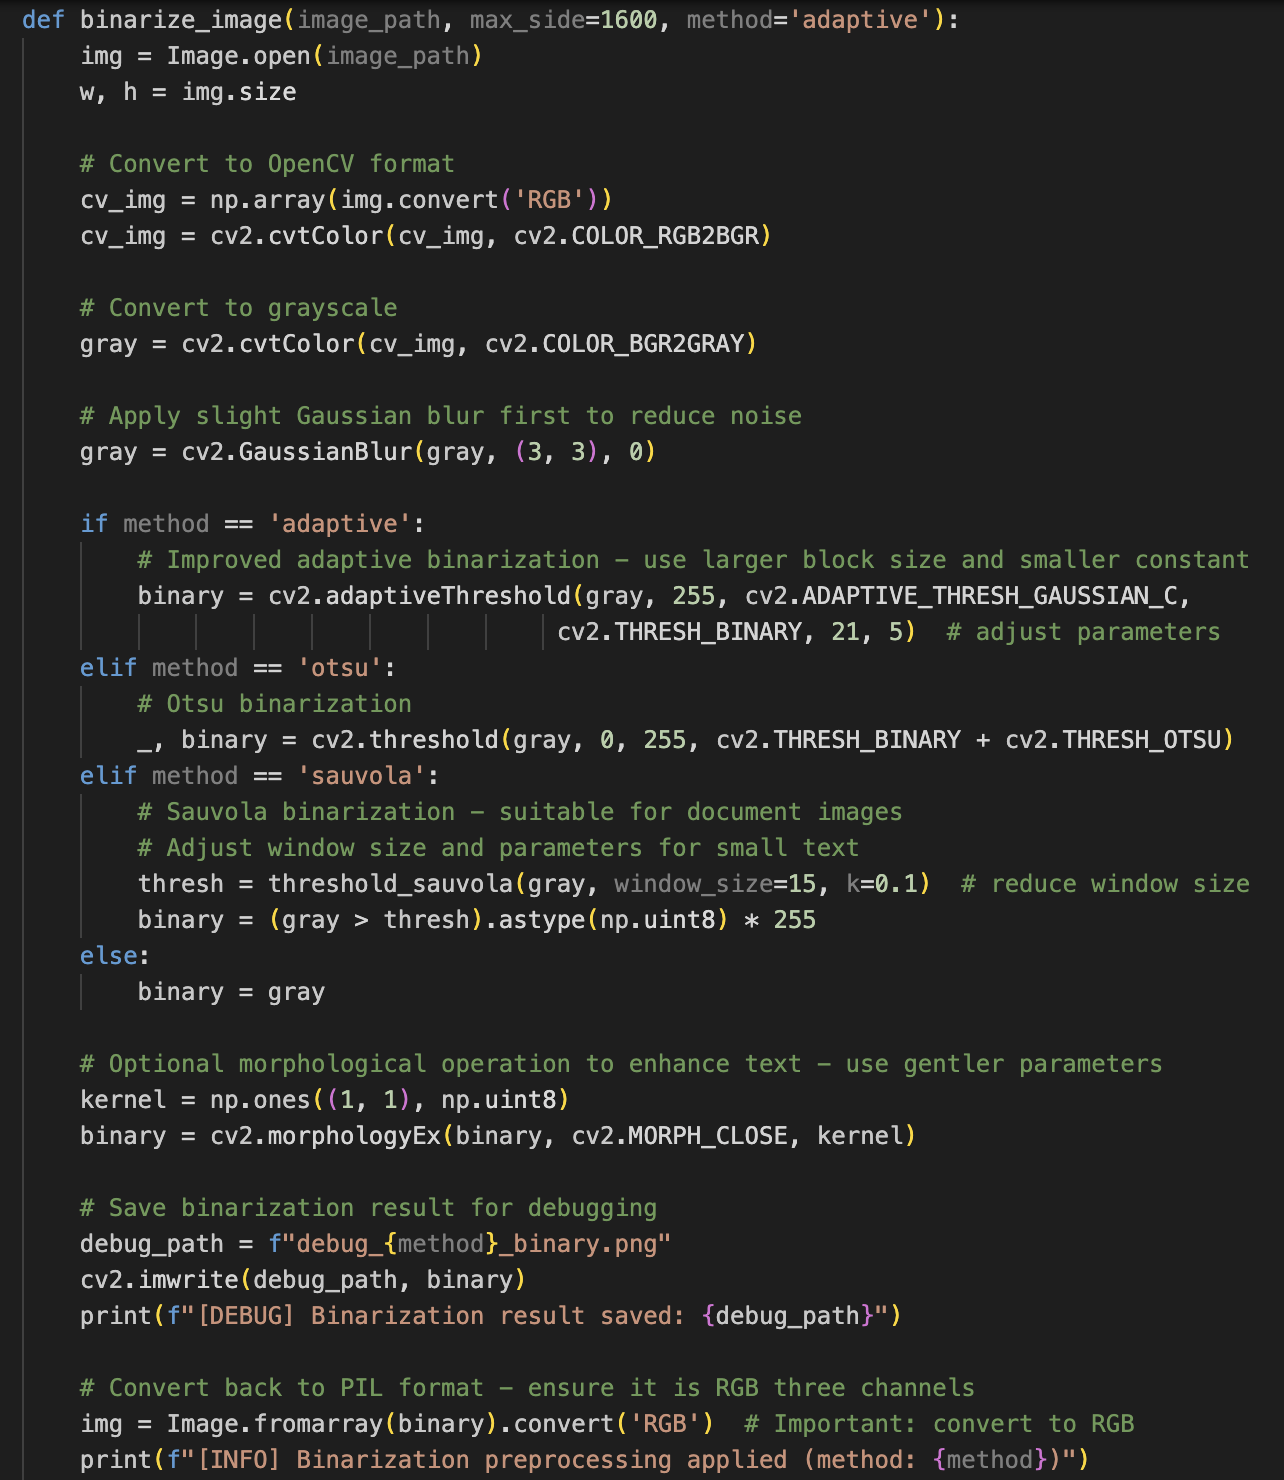
Figure_16 Binarization code
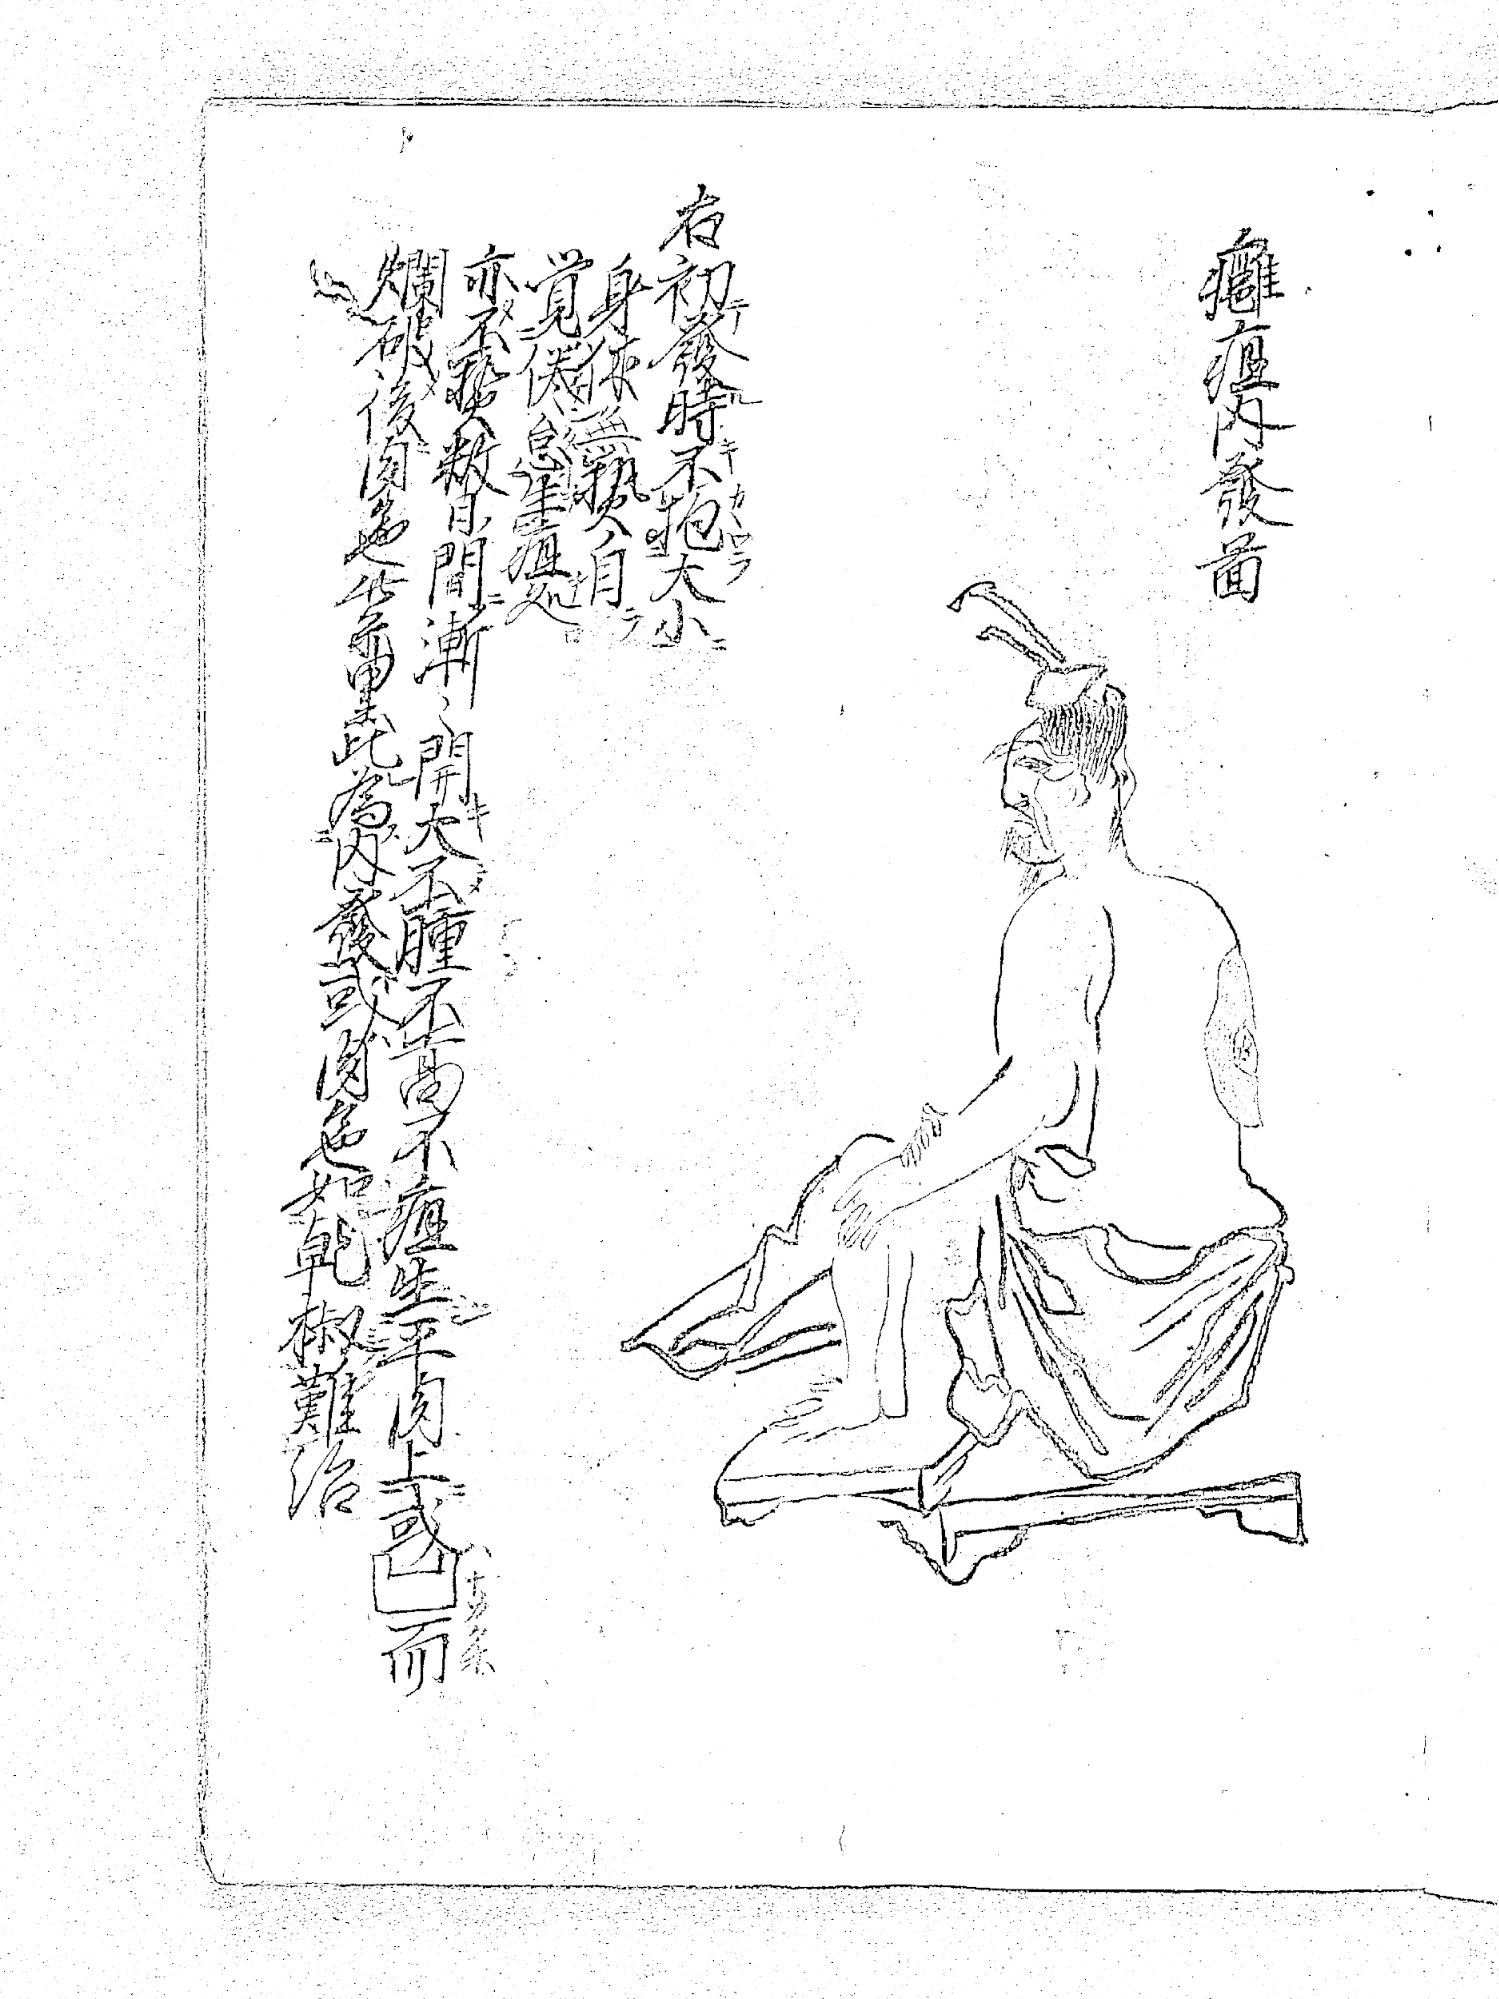
Figure_17 Debug_sauvola_binary
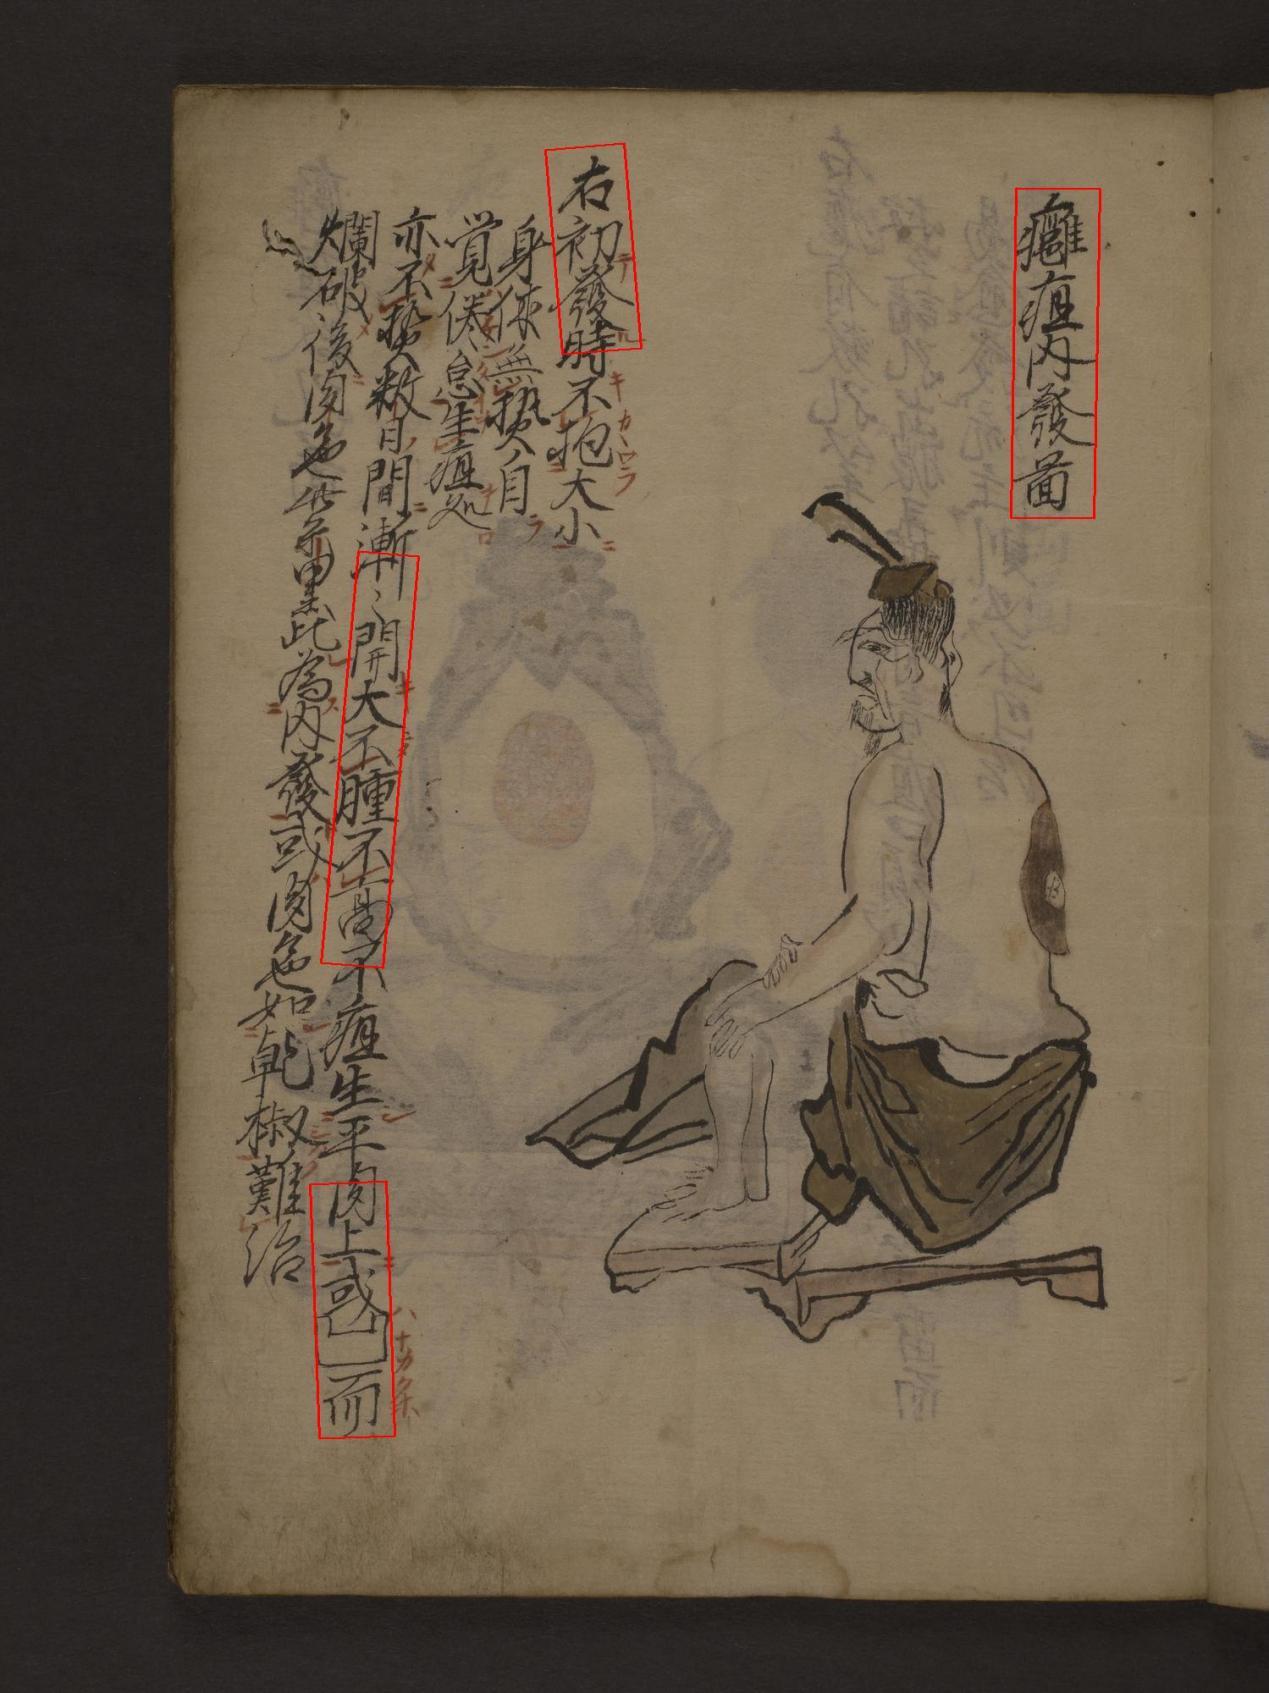
Figure_18 Page9 after binarizaton
Importing into eScriptorium
I then imported my transcription XML.
Schema issues
My PAGE-XML did not match eScriptorium’s schema location (Figure 19, 20). After fixing the PcGts root and the schema reference, I ran into file naming trouble.
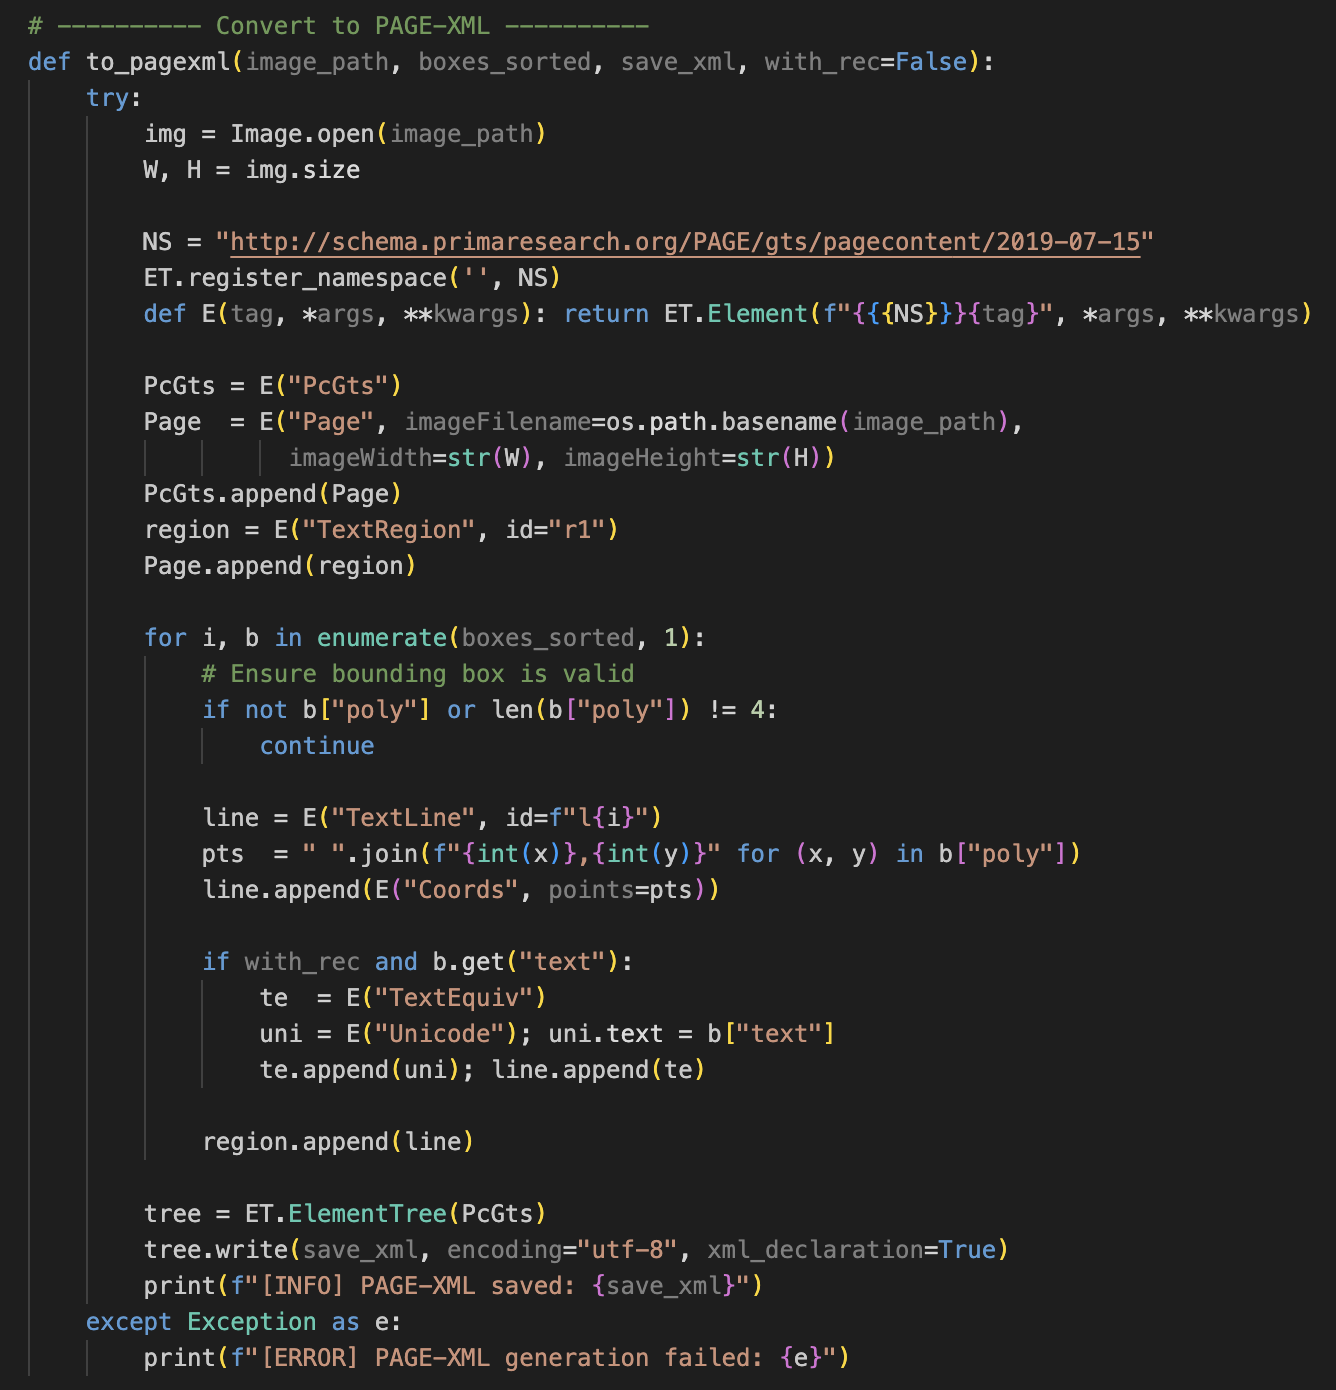
Figure_19 Original to PAGE_XML code
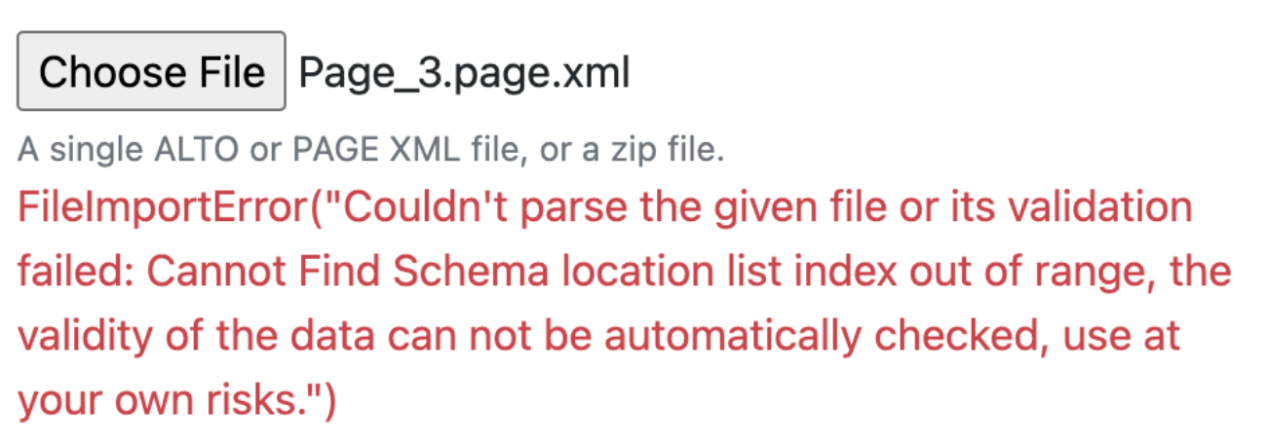
Figure_20 The error
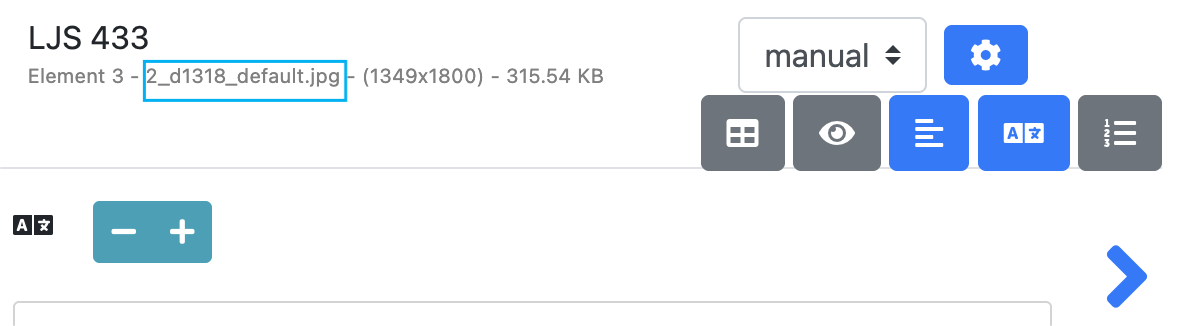
Figure_21 Default name
Filename mismatch
The imageFilename in PAGE-XML must match eScriptorium’s default name for the page. I had renamed files for readability when downloading, so I switched back to the platform’s default names (Figure 21).
Baselines required
eScriptorium expects a baseline for every line. Since ancient Chinese is vertical, the baseline should connect the center of the top and bottom edges of the polygon, not the left and right. I added this to the exporter (Figures 22-1, 22-2, 22-3).
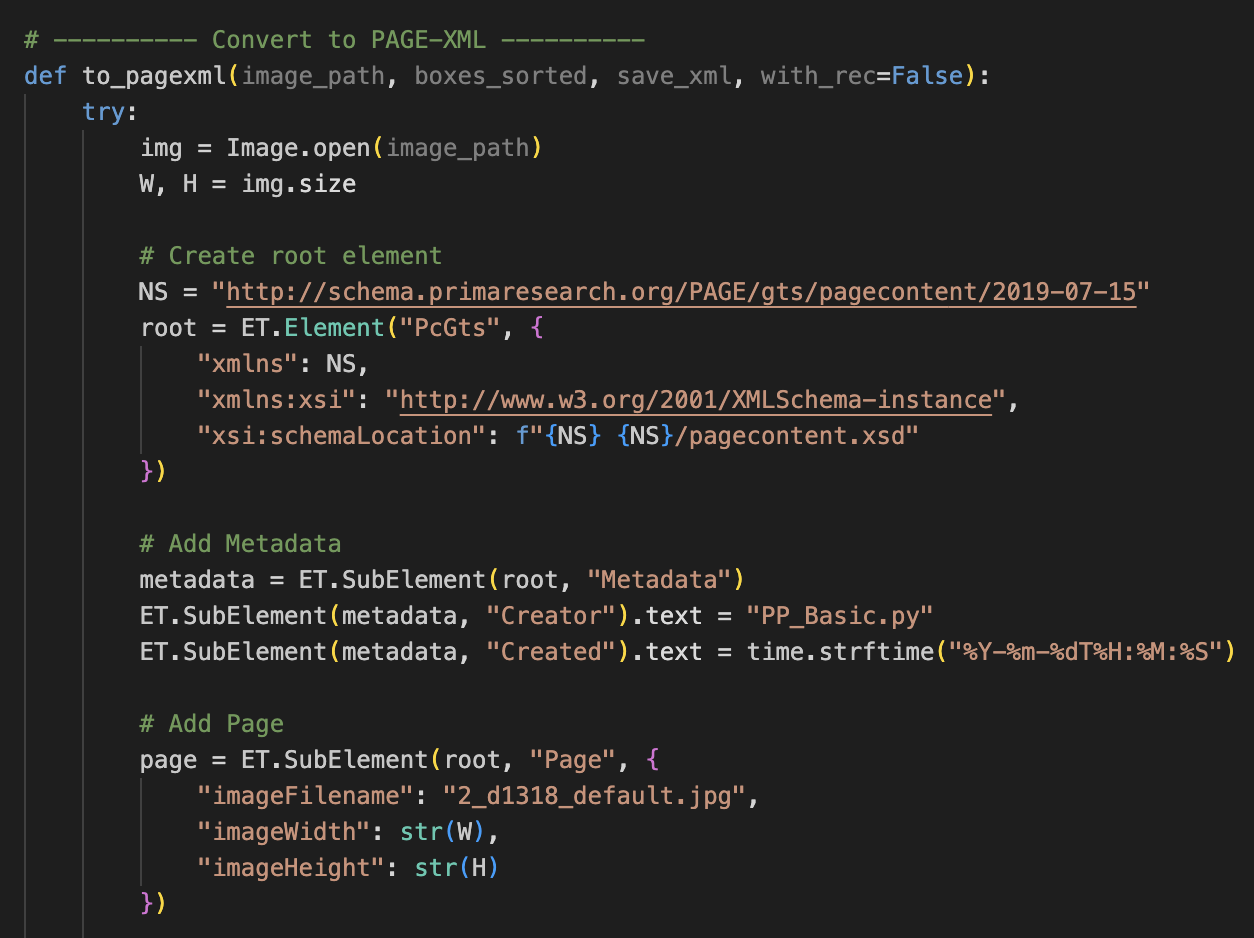
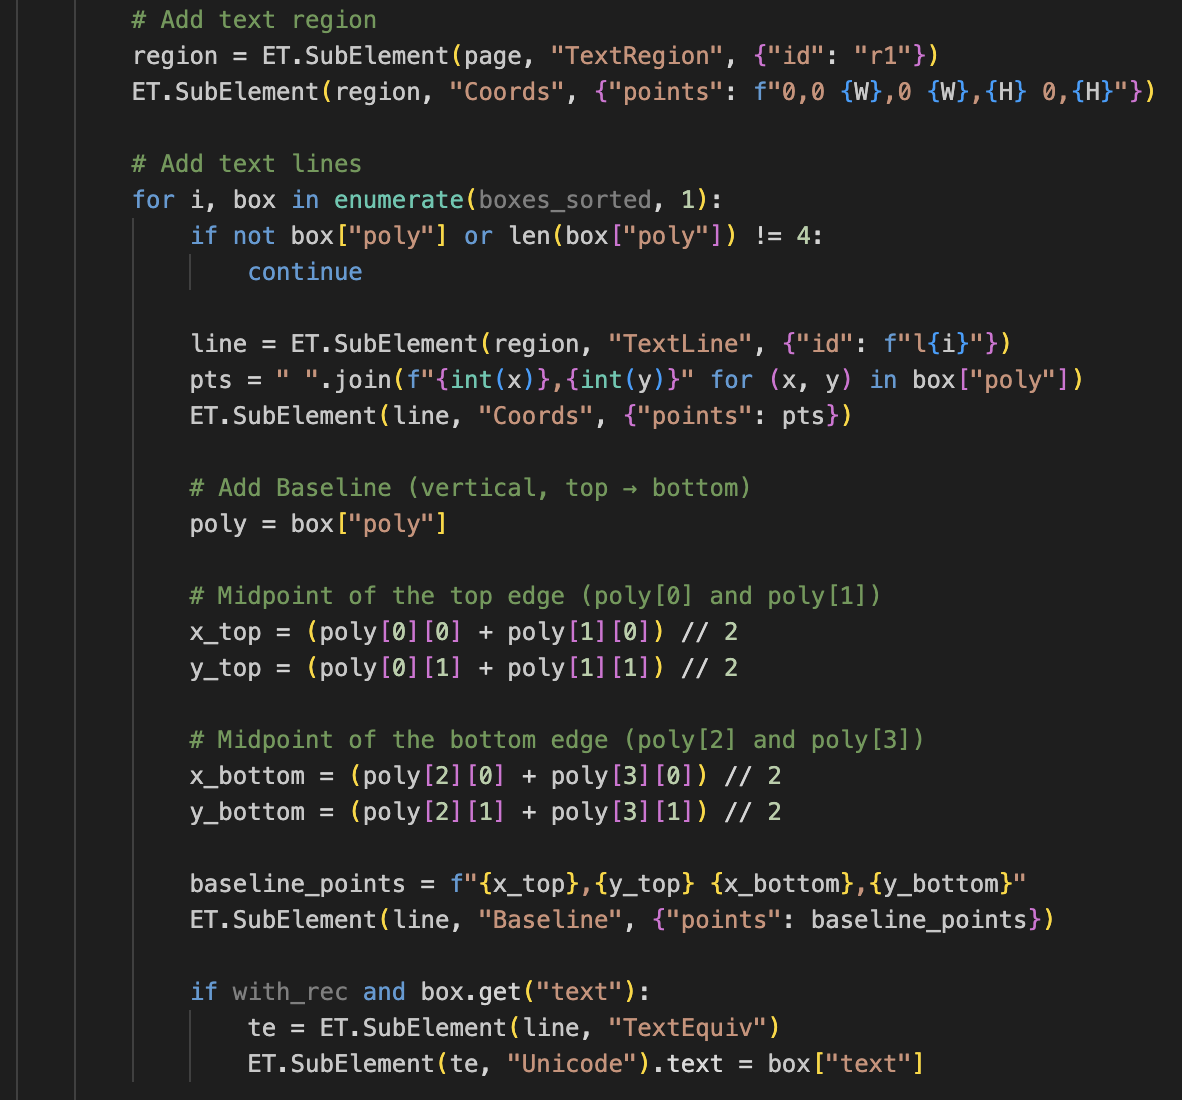
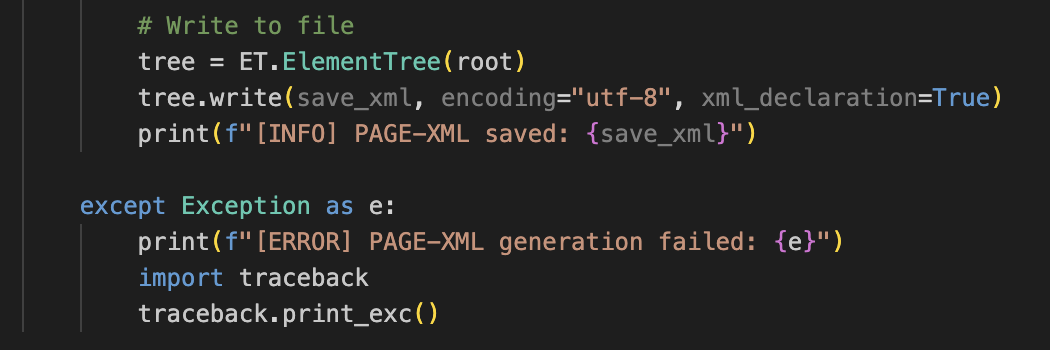
Figure_22-1, 22-2, 22-3 New code for XML output
The mystery of misalignment
After all that, my imported boxes and baselines did not align with the image (Figure 23). I had carefully rescaled coordinates, so this was puzzling.
Two suspects emerged. Either the image I downloaded from eScriptorium to my end was not identical to eScriptorium’s internal copy, or my format conversion from JPG to PNG introduced a tiny scale change. If it was the first, I would need to process images straight from eScriptorium via its API. If it was the second, I could fix it by redownloading and keeping the original name and format.
I tried the simpler path first. I redownloaded the original JPGs, kept the default names, and skipped any conversion. Success (Figure 24).
Figure_23 Misalignment
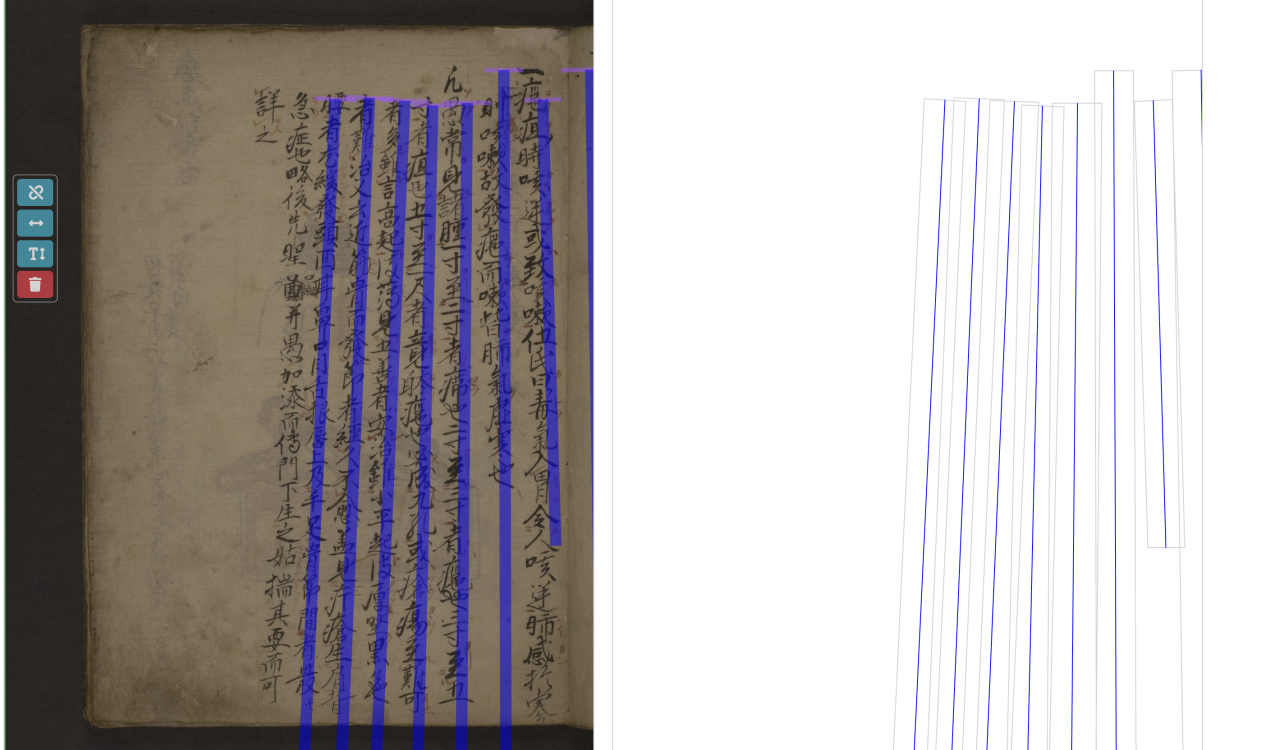
Figure_24 Final success in importing XML
Takeaways
So far, nearly all my problems are solved by intently modifying my code. There are lessons I’ve learned from this process and I want to share them with you.
Tools are only half the story
The same model can perform very differently depending on how you drive it. Learn the options and tune them.
Mind your formats
Always check the current format of the data you are working with, and confirm what the next step expects.
Every method has a price
Enhancements can introduce noise, slow processing, or both. Choose your trade with care.
Keep going
It’s always easier said than done. Every step of progress might take hours, yet with constant trials and errors, we would finally make it! Most problems yield to careful checks and targeted fixes. Persistence pays off.
Period 2: Sept 26 — Oct 22
During the process of uploading XML files, something rather interesting happened. Although all the XML files could be successfully uploaded, a few of the base segmentation results refused to display properly—their result areas were completely blank, while others appeared just fine. After a round of puzzled staring, I decided to check the content of one XML file (and, thanks to Jaj, discovered that dragging it into a browser magically reveals its content, something I really should have known earlier).
That’s when I noticed the culprit: the filename recorded inside the XML file was off. I have no idea why this happened to only some images, but it sparked a thought—could I bypass this naming issue with a bit of code? If you’ve taken a close look at my earlier XML conversion code, you might have noticed that I was hardcoding filenames (yes, I admit it). eScriptorium tends to assign each image a strange default name, and since I couldn’t find a consistent pattern, I had been running the segmentation code separately for each image. To keep everything consistent, I downloaded one image at a time, edited the filename inside the “convert to XML” section, and manually adjusted the function call.
Then an old memory suddenly resurfaced from my early Python-learning courses: you can actually abstract filenames and let your program name the results automatically. A small revelation, but a happy one. So, despite having once sworn I would never touch that part of the code again, I rewrote it (grumbling mildly in the process). The new version looks like this (Figure 25).

Figure_25 Using the abstracted filename
With this change, I reran the images whose XML files had previously failed to display, and it worked!
Next, I upgraded the workflow from single-image copying to batch processing. Previously, because the image name had to be explicitly called in the command, I had no choice but to handle segmentation one image at a time. But now that the program could abstract filenames automatically, I thought, why not just let it handle a whole folder at once? My main code was already mature enough; I just needed to adjust how the main program was called (see Figure 26). Of course this is just where the major modifications take place, other places need a few minor updates for coping with a file with multiple images rather than a single image. But those are not the big deal, just requiring a little patience.
And, success again, I could finally process images in batches!

Figure_26 The main modification
Adding multiple supported image formats was simply a precaution; the ones from eScriptorium are usually JPG, but you can never be too careful about formatting. As for all the little if not … print(f"[]") lines—those are my safety net. After enduring countless small errors and mysterious bugs, I’ve learned that it’s an excellent habit: it keeps me aware of what the program is doing, and if something goes wrong, it tells me exactly where to look.
After successfully uploading XML files on base segmentation, a vital step forward is to input manual transcription.
Period 3: Oct 23 —
A major challenge in transcribing ancient Chinese manuscripts lies in the presence of calligraphic variants—simplified or handwritten forms derived from formal characters. In our case, the most prominent example is ![]() , a variant of 癰, in which the right component 隹 is omitted for writing convenience. On the Colenda Digital Repository, this work is displayed under the title 癰疽圖說, although the actual written form differs. After consulting several variant dictionaries, I identified this character as corresponding most closely to the entry zihai-111520 on GlyphWiki. However, since this variant has not been assigned an official Unicode code point, it cannot be directly input or rendered in standard text editors and must be represented as an image. To input it into the eScriptorium platform, I chose to represent it with the ideographic description sequence (IDS) ⿸疒邕, where 疒 occupies the upper-left as the radical indicating illness, and 邕 forms the right component enclosed by it. Similarly, ⿰身本 represents a character for which 身 constitutes the left-hand part while 本 constitutes the right-hand part. It is a variant of 體. A slightly complicated form would be ⿰氵⿱天水, meaning that 氵functions as the radical on the left, 天 on the right top, and 水 at the right bottom. This is a variant of 添. Moreover, I used ⿰亻きto represent
, a variant of 癰, in which the right component 隹 is omitted for writing convenience. On the Colenda Digital Repository, this work is displayed under the title 癰疽圖說, although the actual written form differs. After consulting several variant dictionaries, I identified this character as corresponding most closely to the entry zihai-111520 on GlyphWiki. However, since this variant has not been assigned an official Unicode code point, it cannot be directly input or rendered in standard text editors and must be represented as an image. To input it into the eScriptorium platform, I chose to represent it with the ideographic description sequence (IDS) ⿸疒邕, where 疒 occupies the upper-left as the radical indicating illness, and 邕 forms the right component enclosed by it. Similarly, ⿰身本 represents a character for which 身 constitutes the left-hand part while 本 constitutes the right-hand part. It is a variant of 體. A slightly complicated form would be ⿰氵⿱天水, meaning that 氵functions as the radical on the left, 天 on the right top, and 水 at the right bottom. This is a variant of 添. Moreover, I used ⿰亻きto represent ![]() , a variant of 傳. This is likely to be a kanji character, kanji is a system of Japanese writing using Chinese characters.
, a variant of 傳. This is likely to be a kanji character, kanji is a system of Japanese writing using Chinese characters.
This is the outcome of manual transcription of the first page with content.

figure _27 Manual Transcription of Page 3
After a few pages of transcription, a thought struck me. The reason I chose IDS was to keep to the diplomatic rule essential for accurate manuscript transcription, which I learned as an undergrad: writing down exactly what you see on the manuscripts even if you think there’s a typo of previous scribes. Now a hard question surfaces: IDS method keeps to the rule indeed, are they really effective for HTR? Manual transcription aims to reproduce the source as faithfully as possible. HTR, by contrast, aims to extract machine-readable, searchable, analyzable semantic information from images—not to make another visual copy. Since one character can appear in multiple variants in the same manuscript, will the model successfully identify them as the same character?
With that in mind, I asked myself: would it be better if I normalize calligraphic variants to their corresponding Unicode characters? In order to find an answer, I went back to the TEI P5 guideline and Unicode Standard for more alternatives in representing unencoded Chinese characters, and finally decided to transcribe all the variants into their encoded standard form while making an auxiliary spreadsheet to record their locations and IDS.
This is an updated version of the first page with content: 
figure _28 Updated Manual Transcription of Page 3
I am grateful to my friend Jingyuan Liu for generously sharing comparative charts of cursive (草書) and standard radical forms, which helped me a lot in identifying variant components. Jingyuan also offered great help in recognizing and ascertaining some elusive scripts. He suggested that some forms might be scribal errors or products of unfamiliarity with Chinese characters rather than “correct” cursive versions.
figure _29 Comparative chart for common radicals_1

figure _30 Comparative chart for common radicals_2
Xing li da quan shu = 性理大全書. Vol. 1 of 32.
Phase 1: Ground truth setup
Period 1: Refining the program (Nov 11 — Nov 18)
My work with this manuscript began, once again, by fixing the Python script. Even though I now have a reliable program that can call PaddleOCR for base segmentation and recognition of right-to-left, vertical Chinese manuscripts, a new issue has appeared. More accurately, it is an old issue in a new form: version conflicts. PaddleOCR depends on NumPy and OpenCV, and both can be silently updated on my laptop. At the same time, PaddleOCR itself is always introducing new API parameters, which can suddenly invalidate earlier code. The overall structure and logic remain usable, yet many commands must be adjusted to match each update. Since this is an open-source project, I feel justified in sighing a little at how quickly it evolves. I cannot stop wondering how many engineers at Baidu are working behind the scenes to generate all these new parameters.
Based on tracebacks on my end (yeah, the lengthy, tortuous tracebacks on the Terminal can contain key information), I decided to establish a virtual environment on Terminal, explicitly install a NumPy 1.x version, reestablish all the packages I need to call PaddleOCR, install an updated PaddleOCR, and run the updated program in this virtual environment.
This is what I do to build the appropriate environment (these versions are not the only ones that can work compatibly, but randomly picked from a range):
python3 -m venv ~/venvs/paddleocr-env
source ~/venvs/paddleocr-env/bin/activate
pip install numpy==1.26.4
pip install opencv-python==4.5.5.64
pip install Pillow==9.5.0
pip install paddlepaddle==3.0.0
pip install paddleocr==3.0.0
pip install lxml pyyaml
After updating the parameters, I ran into the abnormal return again. We actually detected 13 text boxes, yet got 0 back since every box contained only one point when we expected four. “Unstable updated model again?” I thought to myself, and decided to sleep on it. This time, unfortunately, time did not correct anything.
After checking and rechecking the parameters to rule out problems in initiating the model, after writing multiple “if” statements to catch every possible format (the shifts in formats and the sudden appearance and disappearance of parameters during each iteration really turn everything into chaos, and I was so desperate that I included every format I could think of), after writing endless checks and printouts to see each outcome, and after staring at tracebacks again and again, I could only confirm that the major issue lies in the detect_box function. But I still made no real progress. So I made a big fuss and printed out the full structure of the results, including the entire first item.
After several rounds of print-outs and testing, I finally identified the exact structure of the output produced by PaddleOCR 3.2.2’s predict() method.
Here is what I observed:
1. predict() always returns a list, where each element corresponds to one page of OCR results. Even if we process only a single image, the output is still a one-element list, and the first element is the result for page 1.
2. Each page’s result is an OCRResult object. This object contains a .json attribute, which is a dictionary holding the full OCR output.
3. Inside .json, there is a key called 'res', which stores the actual detection and recognition results.
4. The structure looks like this:
res_list = ocr_instance.predict(arr) # list of results for each page
ocr_result = res_list[0] # OCRResult object for the first page
json_data = ocr_result.json # dictionary
res_data = json_data['res'] # actual OCR result dictionary
5. Within res_data, the following keys are most relevant for our workflow:
dt_polys — detected polygons (4 points per text line)
rec_texts — recognized texts
rec_scores — recognition confidence scores
These three lists correspond to each other index-by-index.
6. Although res_data also contains other keys such as rec_polys or rec_boxes, the combination of dt_polys + rec_texts + rec_scores is sufficient for constructing our custom box structure and for generating the PAGE-XML output.
I think that instead of relentlessly updating parameters to “patch known holes,” which only makes an already well-performing model more and more convoluted, what Baidu really needs is to release a detailed and user-friendly manual for newly released versions (despite all the updates, the Paddle manual for OCR is one written in 2022). It should explain how each version of the model functions, how to deploy different versions correctly, and—most ideally—come with complete sample programs showing how to call each version.
With a python program that can stably drive the model, I began the base segmentation for this new manuscript. To my surprise, the first batch of results was very poor. The model could not even consistently recognize the vertical frame or draw boxes in the right places. There were so many misalignments and dislocations. This was a genuinely unexpected accident for me. Since this manuscript has a neater layout and much clearer characters than Yōso zusetsu, I assumed the model would handle it with ease.

Figure_1 Misinterpretting the orientation

Figure_2 Totally misaligh
After reviewing the results, I started to suspect that the existing text frames on the images might be interfering with recognition. On some pages where the lines of characters sit very close together, the text even looks like horizontal writing. Another factor is that, in order to avoid triggering removed parameters and crashing the program, I deleted all the parameters I had previously used to fine-tune the functions. It is possible that adding back adjusted parameters tailored to this manuscript is necessary. So I began exploring the new parameter options.

Figure_3 Updated parameters
“use_doc_orientation_classify” and “use_textline_orientation” are previous “cls.” Turning cls on used to help me ascertain the base segmentation was conducted in the vertical direction. However, it aggravated our results this time.
With adjusted parameters, the output improved for pages with larger fonts and looser layouts, while pages with smaller fonts and denser layouts still produced unsatisfactory results.

Figure_3 Improvement

Figure_4 Still not ideal
No matter how I adjusted the parameters, the pages with dense text just refused to be accurately processed. I even wrote a small detecting function to detect whether existent boxes had longer height than width, and to remove those with shorter heights. Guess what, no boxes were returned. Thus for the first stage I only segmented 44 pages that had relatively sparse text and uploaded their XML files to eScriptorium.
Reference
Yōso zusetsu; 廱疽圖説 - colenda digital repository (no date). Available at: https://colenda.library.upenn.edu/catalog/81431-p3806r (Accessed: October 1, 2025).
GitHub - PaddlePaddle/PaddleOCR: Turn any PDF or image document into structured data for your AI. A powerful, lightweight OCR toolkit that bridges the gap between images/PDFs and LLMs. Supports 80+ languages. (2025) GitHub. Available at: https://github.com/PaddlePaddle/PaddleOCR (Accessed: October 1, 2025).
Clahe histogram equalization - opencv (2020) GeeksforGeeks. Available at: https://www.geeksforgeeks.org/python/clahe-histogram-eqalization-opencv/ (Accessed: October 1, 2025).
U7670 - glyphwiki (no date). Available at: https://glyphwiki.org/wiki/u7670 (Accessed: November 3, 2025).
Unicode standard (no date). Available at: https://www.unicode.org/standard/standard.html (Accessed: November 10, 2025).
TEI Consortium (2025) “Tei p5: guidelines for electronic text encoding and interchange.” Available at: https://doi.org/10.5281/ZENODO.3413524.